
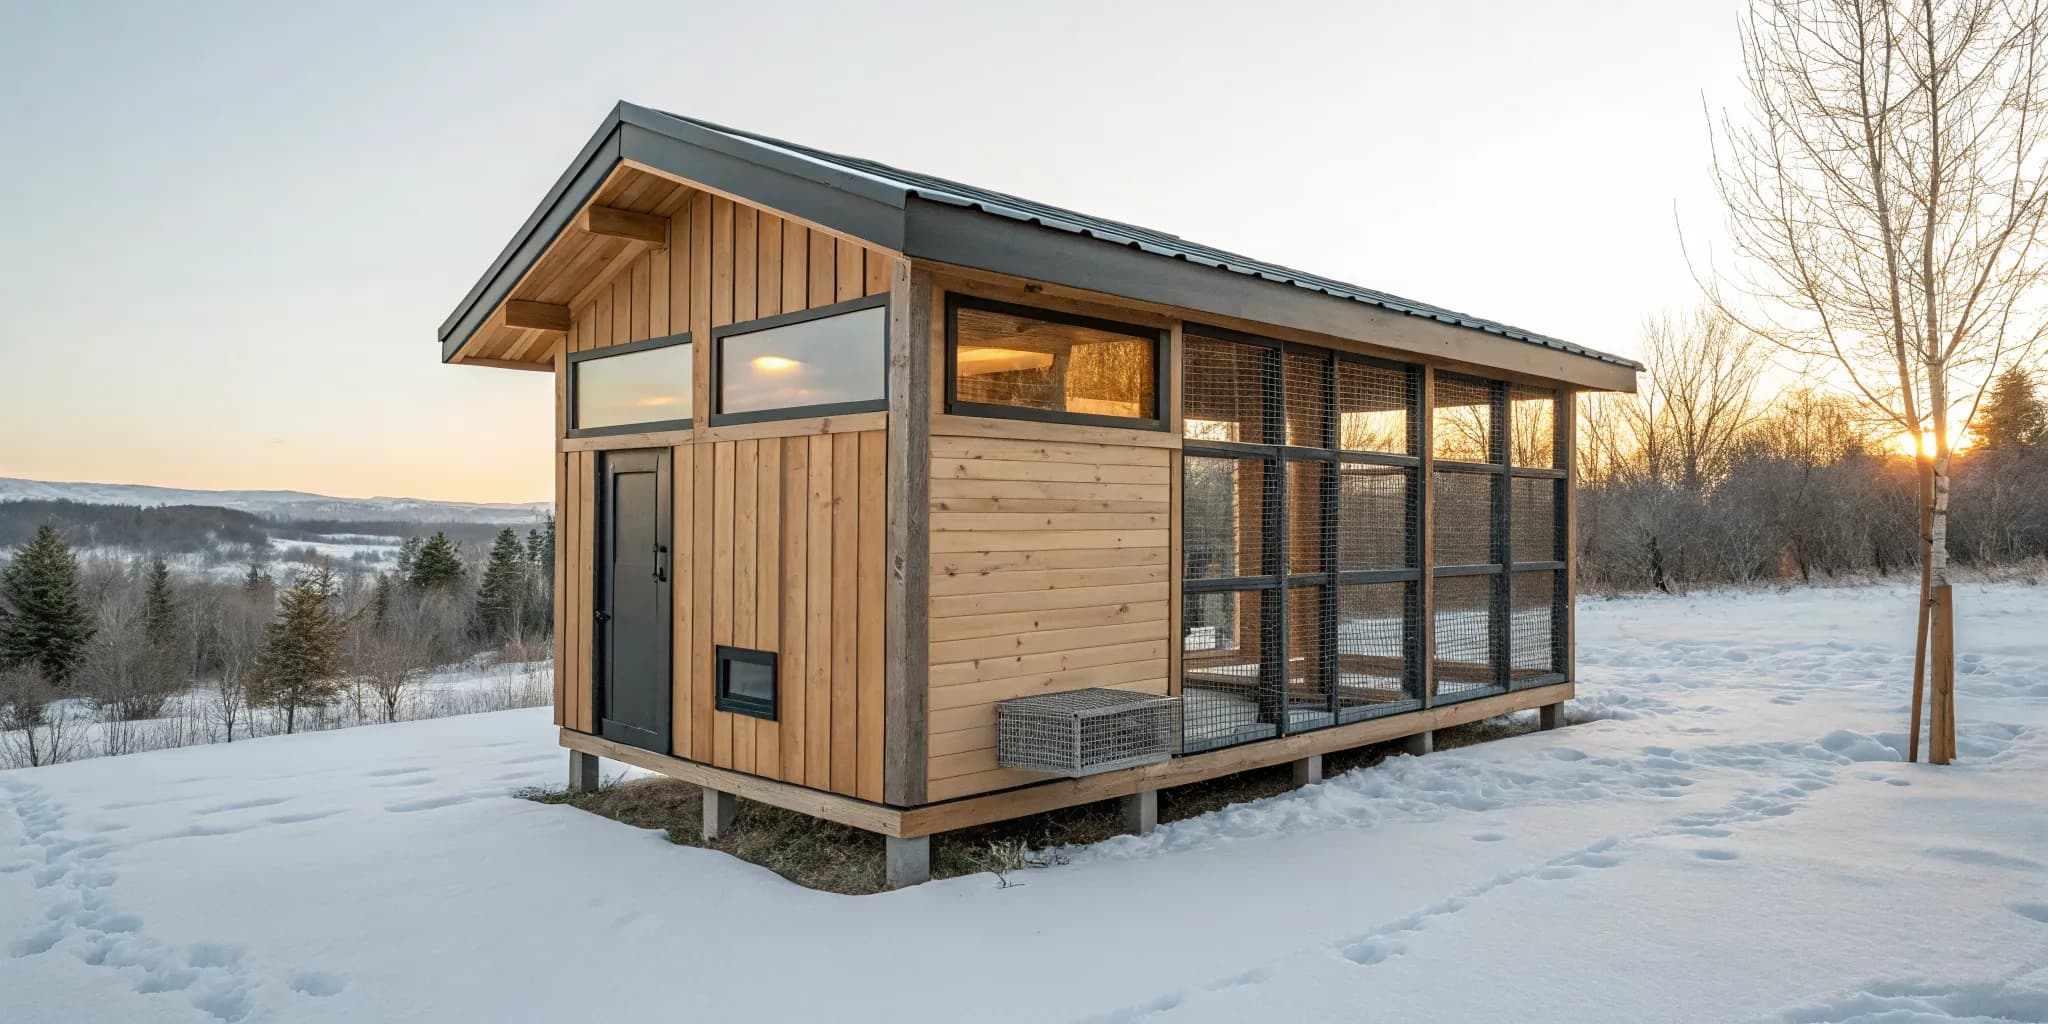
Your first instinct when the temperature drops might be to seal your coop up tight and add a heat lamp. While well-intentioned, this is one of the most common and dangerous mistakes. A true winter proof chicken coop isn't about creating a hot, sealed box; it's about creating a dry, draft-free environment that still has excellent ventilation. Trapped moisture is far more dangerous to your flock than the cold itself. This guide will walk you through the right way to prepare for winter, focusing on safe, effective strategies that work with your chickens' natural ability to stay warm.
Key Takeaways
- Focus on a dry, draft-free coop, not an airtight one: Seal gaps near the floor to block cold winds, but keep high vents open to allow moisture and ammonia to escape. A dry environment is more important for your flock's health than a warm one.
- Generate warmth safely using natural methods: Avoid dangerous heat lamps. Instead, use the deep litter method for gentle, compost-generated heat and provide high-calorie grains like corn before roosting to help your chickens produce body heat overnight.
- Prevent winter health issues with proactive care: Ensure constant access to unfrozen water, install wide and flat roosting perches so chickens can cover their feet, and apply petroleum jelly to large combs and wattles to protect them from frostbite.
What Makes a Coop Winter-Proof?
A truly winter-proof chicken coop isn't about creating a tropical paradise for your flock. It’s about building a shelter that stays dry, draft-free, and well-ventilated to help your chickens comfortably weather the cold. Chickens are surprisingly hardy and generate a good amount of body heat on their own. A great coop works with their natural ability to stay warm. The four key elements of a winter-ready coop are proper insulation, smart ventilation, a solid structure, and a draft-free design. Getting these right is the secret to happy, healthy chickens all winter long.
Proper Insulation
Your chickens come with their own down jackets, so the goal of insulation isn't to heat the coop but to trap the body heat your flock naturally produces. Good insulation helps maintain a stable, dry environment without making it stuffy. Think of it as creating a cozy pocket of air that holds onto warmth. For an easy DIY solution, you can tack thick moving blankets to the inside walls. The key is to add a layer that helps retain warmth without completely sealing the coop, which is where ventilation comes in. A well-insulated space makes it much easier for your birds to stay warm using their own body heat.
Smart Ventilation
This might sound counterintuitive, but good airflow is one of the most critical parts of a winter coop. The real danger in winter isn't the cold, it's moisture. Chickens release a lot of moisture when they breathe, and their droppings produce ammonia. Without ventilation, that damp, ammonia-filled air gets trapped, leading to frostbite and respiratory problems. The solution is to have vents high up in the coop, well above where your chickens roost. This allows the warm, moist air to escape without creating a cold draft directly on your birds. It’s a delicate balance between preventing drafts and ensuring airflow.
A Solid Structure
A sturdy, well-built coop is your first line of defense against winter weather. Before the temperature drops, inspect your coop for any gaps, cracks, or holes, especially at or below the chickens' roosting level. Sealing these openings prevents chilly winds from blowing directly on your flock and stops snow from getting inside. A solid structure does more than just keep the cold out; it also protects your chickens from predators and pests like mice that might be looking for a warm place to hide. Starting with one of our high-quality chicken coops gives you a strong foundation, making winter prep much simpler.
A Draft-Free Design
While ventilation is essential, drafts are a chicken's worst enemy. A draft is any unwanted cold air blowing directly on your birds, and it can quickly chill them and cause health issues. The best way to check for drafts is to sit inside the coop at roost level on a windy day. Feel for any air movement and seal those spots. Pay close attention to windows, doors, and any seams in the construction. A draft-free design ensures your chickens can rest comfortably without being subjected to stressful cold breezes, which is a key part of preparing your coop for winter.
How to Insulate Your Chicken Coop for Winter
Keeping your flock warm and dry through a New York winter starts with good insulation. A well-insulated coop protects your chickens from frigid temperatures and biting winds, but it’s about more than just adding stuffing to the walls. The goal is to create a dry, draft-free environment that still allows moisture to escape. When done right, insulation helps your chickens conserve their energy for staying warm and laying eggs instead of just surviving the cold.
Starting with a sturdy, well-built structure is half the battle. A quality coop will have solid walls and a tight roof, giving you a much better starting point for your winter preparations. From there, you can add specific materials and use simple methods to make the space cozy. Let’s walk through the best ways to insulate your coop to ensure your flock stays comfortable all season long.
Choosing Your Insulation: Foam, Fiberglass, or Natural Options
When it comes to insulating materials, you have a few great options. Rigid foam board is a popular choice because it’s easy to cut and install. You can also use traditional fiberglass batts. The most important rule with either of these is to cover the insulation completely with a layer of plywood or other durable material. Chickens will peck at exposed foam or fiberglass, which is not only bad for the insulation but also dangerous for their health. For a budget-friendly and surprisingly effective alternative, you can tack thick moving blankets to the inside walls for an extra layer of warmth. Starting with one of our high-quality chicken coops gives you a solid frame that makes adding any type of insulation simple and effective.
Using the Deep Litter Method for Warmth
One of the best ways to generate natural heat in your coop is the deep litter method. Instead of cleaning out the coop bedding every week, you simply add a fresh layer of pine shavings or straw on top of the old one. As the bottom layers begin to decompose, the composting process creates a surprising amount of heat, warming the coop from the floor up. This method also gives your chickens a thick, fluffy cushion to walk on. To get started, just let the bedding build up over time, adding fresh material whenever it starts to get damp or smelly. This natural process not only keeps your flock warm but also saves you a lot of time on winter clean-up.
Where to Focus Your Insulation Efforts
Your main goal is to stop drafts without sealing the coop up too tightly. Cold air drafts that blow across the floor or roosting perches are what really chill your chickens. Focus on sealing any gaps or cracks in the walls, especially near the floor. Use caulk or weatherstripping to close up small openings around windows and doors. While you want to block drafts, you still need good ventilation to let moist air escape. Moisture is more dangerous than cold, as it can lead to frostbite and respiratory issues. Make sure you have vents located high up in the coop, far above where your chickens roost. This allows damp, warm air to rise and exit while keeping your flock out of the direct airflow.
Does a Winter Coop Still Need Ventilation?
When the temperature drops, your first instinct might be to seal your chicken coop up tight to keep your flock warm. It feels like the right thing to do, but it’s one of the biggest mistakes you can make. Proper airflow is absolutely critical in the winter, even more so than during warmer months. While it's tempting to plug every hole to conserve heat, a sealed coop quickly becomes a hazardous space. Chickens release a surprising amount of moisture just by breathing, and their droppings add both moisture and ammonia to the air. Without an escape route, this damp, stale air gets trapped inside.
This creates a humid environment that can lead to serious health issues like frostbite and respiratory infections. The key is to find the right balance: you want excellent ventilation to let the bad air out, but you don’t want cold drafts blowing directly on your birds. A draft is a concentrated stream of cold air, while ventilation is a gentle, overall air exchange. Understanding this distinction is the first step toward creating a coop that is both warm and healthy. A well-ventilated coop stays drier, smells better, and provides a much safer home for your flock through the coldest months.
Why Moisture Is More Dangerous Than Cold
Chickens are surprisingly resilient to cold, thanks to their downy feathers that trap body heat. What they can’t handle is being cold and wet. Each chicken releases a significant amount of moisture into the air just by breathing and, of course, through their droppings. Without ventilation, that moisture has nowhere to go. It condenses on the cold surfaces inside the coop, making the bedding damp and the air heavy. This dampness can lead to frostbite on combs and wattles and creates the perfect breeding ground for harmful bacteria. It also allows toxic ammonia from the droppings to build up, which can cause serious respiratory illnesses. A dry, well-ventilated coop is a much safer and healthier home than a sealed, humid one.
Place Vents High and Away From Roosts
So, how do you ventilate without freezing your flock? The solution is to place your vents high up in the coop, well above where your chickens roost. Since warm, moist air naturally rises, vents located near the ceiling or at the top of the walls will allow it to escape effectively. This setup pulls the damp air and ammonia fumes out of the coop without creating a chilly breeze down at roosting level. Many well-designed chicken coops come with built-in vents along the roofline for this exact purpose. You can leave these open all winter long to ensure a constant, gentle exchange of air that keeps the environment fresh and dry for your birds.
How to Block Drafts Without Sealing the Coop
It’s important to understand the difference between ventilation and a draft. Ventilation is the slow, steady circulation of air, while a draft is a direct, cold stream of air that can quickly chill a chicken. Your goal is to eliminate drafts while maintaining ventilation. Start by inspecting your coop at your chickens’ level. Seal any cracks or holes in the walls, especially near the floor and roosting perches. Pay close attention to gaps around windows and the main door. By blocking these lower entry points, you stop cold air from blowing directly onto your flock. This way, you can keep your upper vents open for moisture to escape, creating a draft-free but well-ventilated space for your chickens to stay cozy all winter.
How to Keep Water From Freezing
One of the biggest challenges of winter chicken care is ensuring your flock has constant access to fresh, unfrozen water. Chickens need to stay hydrated to digest their food, regulate their body temperature, and continue laying eggs. A frozen water source can lead to dehydration and other health issues in a surprisingly short amount of time. Even the most perfectly insulated coop can’t stop water from freezing when the temperatures in Hudson Falls dip below 32°F. This is a daily reality for chicken keepers in our area, and it requires a solid plan.
Fortunately, you have several options to keep the water flowing all winter long. The right choice for you will depend on whether you have electricity in your coop, your budget, and how much time you can commit to daily chores. Some methods are automated, while others require a bit more hands-on effort. No matter which path you choose, checking the water daily is a non-negotiable part of keeping your flock healthy and happy through the cold months. Let’s walk through the most effective methods to make sure your birds are never left thirsty.
Invest in a Heated Waterer
If your coop has access to electricity, investing in a heated waterer is the most reliable, hands-off solution. These are specifically designed for poultry and are much safer than trying to rig a DIY heating element. You can find a few different types, including heated bases that you place under a metal waterer or all-in-one heated plastic founts. Some systems even use a small deicer to keep the water moving, which helps prevent freezing. While they have an upfront cost, they save you the daily chore of swapping out frozen water containers, giving you peace of mind that your chickens always have drinkable water.
Use a Heated Dog Dish as a Budget-Friendly Option
For a more budget-friendly electric option, a heated dog dish works wonderfully. These are readily available at most farm or pet supply stores and are designed for outdoor use in freezing temperatures. They are sturdy, easy to clean, and get the job done without the higher price tag of some specialty poultry waterers. The open-bowl design is also easy for multiple chickens to drink from at once. Just be sure to place it on a stable, level surface and partially cover the top with a piece of wood or hardware cloth to prevent your chickens from accidentally stepping in and getting their feet wet.
Tips for Daily Water Management
If you don't have electricity in your coop or prefer a non-electric approach, you can absolutely manage with a manual system. The key is consistency. The easiest method is to have at least two identical waterers. Keep one inside your home and swap it with the frozen one in the coop each morning. This ensures your flock starts every day with fresh, unfrozen water. To keep the water clean and prevent bedding from being kicked into it, place the waterer on a small stand made of bricks or a wood block. A well-designed chicken coop with enough space to move around makes this daily chore much simpler. For more tips, the University of Minnesota Extension offers excellent advice on caring for chickens in cold weather.
How to Protect Chickens From Frostbite
Even with a well-built coop, the biting New York cold can pose a risk to your flock. Frostbite is a serious concern, but you can prevent it with a few smart adjustments to your coop and routine. A secure, draft-free structure is your first line of defense, and our chicken coops are designed to provide a safe haven. Beyond that, focusing on at-risk areas like combs, wattles, and feet will help keep your chickens comfortable and healthy all winter long.
Know Which Chickens Are Most at Risk
Not all chickens are equally suited for cold climates. Some breeds are naturally more resilient. Heavier, fluffy breeds like Orpingtons, Wyandottes, and Ameraucanas generally handle cold weather better thanks to their dense feathering and smaller combs. On the other hand, breeds with large, single combs and wattles, like Leghorns, are more susceptible to frostbite because these exposed areas lose heat quickly. If your flock includes more vulnerable breeds, you’ll want to pay extra attention to them when the temperatures drop.
Provide Wide, Flat Roosting Perches
One of the simplest and most effective changes you can make inside your coop is to install wide, flat roosting perches. Many people use round dowels or branches, but a flat piece of wood, like a 2x4 with the wide side up, is much better for winter. This shape allows your chickens to roost flat-footed, which means they can cover their entire foot and toes with the warm feathers of their body. This simple switch helps them conserve precious body heat and protects their feet from frostbite while they sleep.
Protect Combs and Wattles with Petroleum Jelly
A chicken’s comb and wattles are like radiators, helping them cool off in the summer but making them extremely vulnerable to frostbite in the winter. You can spot frostbite as black or gray patches on the tissue. To help prevent this, you can gently apply a layer of petroleum jelly to their combs and wattles during cold snaps. This creates a barrier against moisture and cold air. It’s important to remember that this is a preventative measure, not a cure for existing frostbite.
Add Extra Bedding for Warmth and Dryness
A thick layer of bedding on the coop floor is essential for winter warmth. Using a deep litter method, where you continuously add fresh bedding on top of the old, creates a thick insulating blanket over the cold ground. As the bottom layers begin to compost, they generate a small amount of natural heat, which helps warm the entire coop. We recommend using absorbent materials like pine shavings or straw to keep the environment dry, as moisture is a major contributor to frostbite and other health issues.
Prep Your Coop Before the First Frost
That first crisp autumn morning is your signal to get the chicken coop ready for the colder months ahead. A little prep work before the first frost can make a world of difference for your flock's comfort and health. Think of it as fall cleaning with a purpose: creating a cozy, safe haven that will stand up to a New York winter. By tackling these tasks now, you can relax and enjoy the season, knowing your chickens are snug and secure. Let’s walk through the key areas to focus on.
Seal Every Gap and Crack
Drafts are the biggest enemy of a warm coop, especially those that blow in at roosting level. A constant, chilly breeze can stress your chickens and make it harder for them to stay warm. Take a walk around your coop and look for any small gaps or cracks, paying close attention to the areas near the floor. Use caulk or weatherstripping to seal up these openings completely. This simple fix is one of the most effective things you can do to keep your flock comfortable. A well-built chicken coop will have tight seams, but it's always smart to check for any settling or wear that might have created small openings over time.
Inspect the Roof, Walls, and Floor
A thorough inspection is your next step. Check the roof for any missing shingles or signs of leaks, and examine the walls and floor for holes or weak spots. These aren't just entry points for cold air; they're also an open invitation for mice and other pests seeking shelter. If your coop isn't insulated, you might consider adding some. Just be sure to use a chicken-safe material and cover it completely so your birds can't peck at it. When you invest in a quality structure, you can trust its durability, which is why we stand by our 5-year warranty on materials and workmanship. Still, a seasonal check-up is always a good habit.
Create a Sheltered Outdoor Run
Even on cold days, your chickens will appreciate having access to an outdoor space for fresh air and exercise. You can make their run much more comfortable by adding a windbreak. Wrapping the sides of the run with clear plastic sheeting or tarps can block harsh winds and even create a nice greenhouse effect on sunny days. You can also stack straw bales around the perimeter for extra protection. This doesn't need to be a major construction project. A few simple materials can transform the run into a sheltered space where your flock can still enjoy the outdoors without being exposed to the worst of the winter weather.
Should You Heat Your Chicken Coop?
When the temperatures in Hudson Falls start to plummet, it’s natural to worry about your flock. While chickens are surprisingly resilient to cold, the decision to add heat to your coop is a serious one. Before you add a heat source, remember that a well-built chicken coop is your first and best defense against the cold. A sturdy, draft-free structure with good ventilation and deep, dry bedding is often all healthy, adult chickens need to stay comfortable.
Adding a heater can sometimes do more harm than good. Chickens that get used to artificial heat don't acclimate properly to the cold, which can be dangerous during a power outage. The bigger issue, however, is the significant risk of fire. Instead of simply asking if you should heat your coop, the better question is how to do it safely, if at all. There are much safer ways to help your flock through the winter than a traditional heat lamp, from specialized heaters to simple changes in their diet.
Understand the Risks of Using Heat Lamps
If you take away one piece of advice, let it be this: avoid heat lamps. While they seem like a quick fix, heat lamps are a leading cause of coop fires. Your coop is full of flammable materials like dust, dry bedding, and feathers. All it takes is a lamp falling, a bulb breaking, or a chicken flying into it to start a devastating fire. Many long-time chicken keepers strongly advise against using them because the fire hazard is simply too high. A power outage on a cold night is a problem, but a coop fire is a tragedy. Given that chickens can regulate their own body temperature, the risk is rarely worth the reward.
Choose Safer Heating Alternatives
If you have a less cold-hardy breed or feel supplemental heat is absolutely necessary, choose a safer option designed for this environment. Look for flat-panel radiant heaters that are specifically made for chicken coops. These heaters, like those from Cozy Products, have no exposed hot parts and are much safer to operate around flammable bedding. They provide gentle, ambient warmth rather than intense, direct heat. For an even safer setup, you can plug your heater into a Thermo Cube. This handy device only turns the power on when the temperature drops near freezing and shuts it off once it warms up, saving electricity and minimizing risk.
Feed for Warmth with High-Calorie Foods
One of the safest and most effective ways to help your chickens stay warm is through their diet. The process of digestion naturally creates body heat, so you can use this to your flock’s advantage. As temperatures drop, provide your chickens with extra high-calorie foods. Giving them a handful of cracked corn or scratch grains before they roost for the night is a great strategy. These foods take longer to digest, which helps their bodies generate heat throughout the night. It’s a simple, inexpensive, and completely fire-proof way to ensure your flock has the fuel it needs to stay warm from the inside out.
Is Your Coop Ready for a New York Winter?
As the days get shorter and a chill fills the air, it’s time to think about how your flock will handle a New York winter. A flimsy coop that felt fine in July can become a serious problem in January, leaving your birds vulnerable to frostbite, respiratory illness, and stress. Your chickens are tougher than they look, but they rely on a secure, dry, and comfortable home to stay healthy through freezing temperatures and heavy snow. Getting your coop ready isn't just about plugging in a heat lamp; it's about creating a structure that works with nature to keep your birds safe. Before the first real frost hits, take a good look at your setup and see if it has what it takes to withstand the season ahead. Think about wind, moisture, and insulation. A well-prepared coop means less worry for you and a much happier, healthier flock that continues to thrive even when the landscape is covered in white. It's about proactive care that pays off in the long run, ensuring your chickens emerge in the spring ready for another productive year.
What to Look for in a Quality Winter-Ready Coop
A great winter coop masters the balance between ventilation and insulation. You might be tempted to seal every crack, but good airflow is essential to let moisture escape and prevent respiratory issues. Look for vents placed high above the roosts, far from where your chickens sleep. At the same time, you need to block drafts at floor level. Use weatherstripping or caulk to seal any gaps that could let a chilly wind blow directly on your birds. A solid structure with the option for deep bedding provides excellent insulation from the cold ground. Finally, a protected outdoor run gives your chickens a safe place to get fresh air without being exposed to harsh winds, helping you prep your coop for cold weather.
Explore Custom Chicken Coops from Legacy Structures
If your current setup feels more like a liability than an asset for winter, it might be time for an upgrade. Instead of spending weekends trying to patch and insulate an old coop, you can start with a building designed for our climate. Our durable chicken coops are built with the structural integrity needed to handle heavy snow and protect your flock from the elements. We understand the importance of proper ventilation and draft protection. By choosing a well-built coop from the start, you ensure your chickens have a safe, dry, and comfortable home, keeping them healthy and productive all winter long. Let us help you create the perfect winter-proof home for your flock.
Related Articles
- Chicken Coop | Legacy Structures
- Animal Shelter | Legacy Structures
- Lofted Barn Playhouse | Legacy Structures
- Lofted Barn Playhouse | Legacy Structures
- Lofted Barn | Legacy Structures
Frequently Asked Questions
What are the most important things to do to get my coop ready for winter? Your main goals are to keep the coop dry and free of drafts. Chickens handle cold much better than they handle being damp. Start by sealing any cracks or holes near the floor to stop cold air from blowing directly on your flock. At the same time, make sure you have vents high up near the roof that remain open to let moisture escape. Finally, add a deep layer of fresh bedding, like pine shavings, to insulate the floor and give your chickens a cozy space.
You say I need ventilation but also need to block drafts. How do I do both? This is a great question because it gets to the heart of a healthy winter coop. Think of it this way: ventilation happens high, and drafts happen low. You want vents located near the ceiling to allow the warm, moist air your chickens breathe out to escape. This prevents dampness and ammonia buildup. Drafts are cold breezes that blow across the floor or roosts, so you should seal any gaps in the walls, windows, or doors at your chickens' level. This creates a draft-free living space with healthy air circulation above.
Are heat lamps really that dangerous? I'm worried my chickens will freeze. Yes, traditional heat lamps are a significant fire hazard in a space filled with dry bedding, dust, and feathers. We strongly advise against using them. Healthy, adult chickens acclimate to the cold and huddle together for warmth. If you feel you must add heat, choose a much safer option like a flat-panel radiant heater designed specifically for coops. These have no exposed bulbs or hot surfaces. A completely safe alternative is to give your flock cracked corn before bed, as digesting it helps them generate body heat all night long.
My coop doesn't have electricity. What's the best way to keep the water from freezing? Without electricity, your best strategy is the swap-out method. You will need two identical water containers. Keep one inside your house where it’s warm, and each morning, swap it with the frozen one in the coop. This guarantees your flock has fresh water to start the day. Bringing the frozen waterer inside allows it to thaw and be ready for the next day's swap. It’s a simple daily chore that is essential for keeping your chickens hydrated and healthy.
How can I protect my chickens' large combs from frostbite? Breeds with large, single combs are definitely more at risk. The best defense is a dry, draft-free coop, as moisture is the biggest contributor to frostbite. You can also provide extra protection by gently applying a thin layer of petroleum jelly to their combs and wattles during severe cold spells. This creates a barrier against the cold and wet. Also, make sure your roosting perches are wide and flat, like a 2x4 board, so your chickens can cover their feet with their feathers and stay warmer while they sleep.