
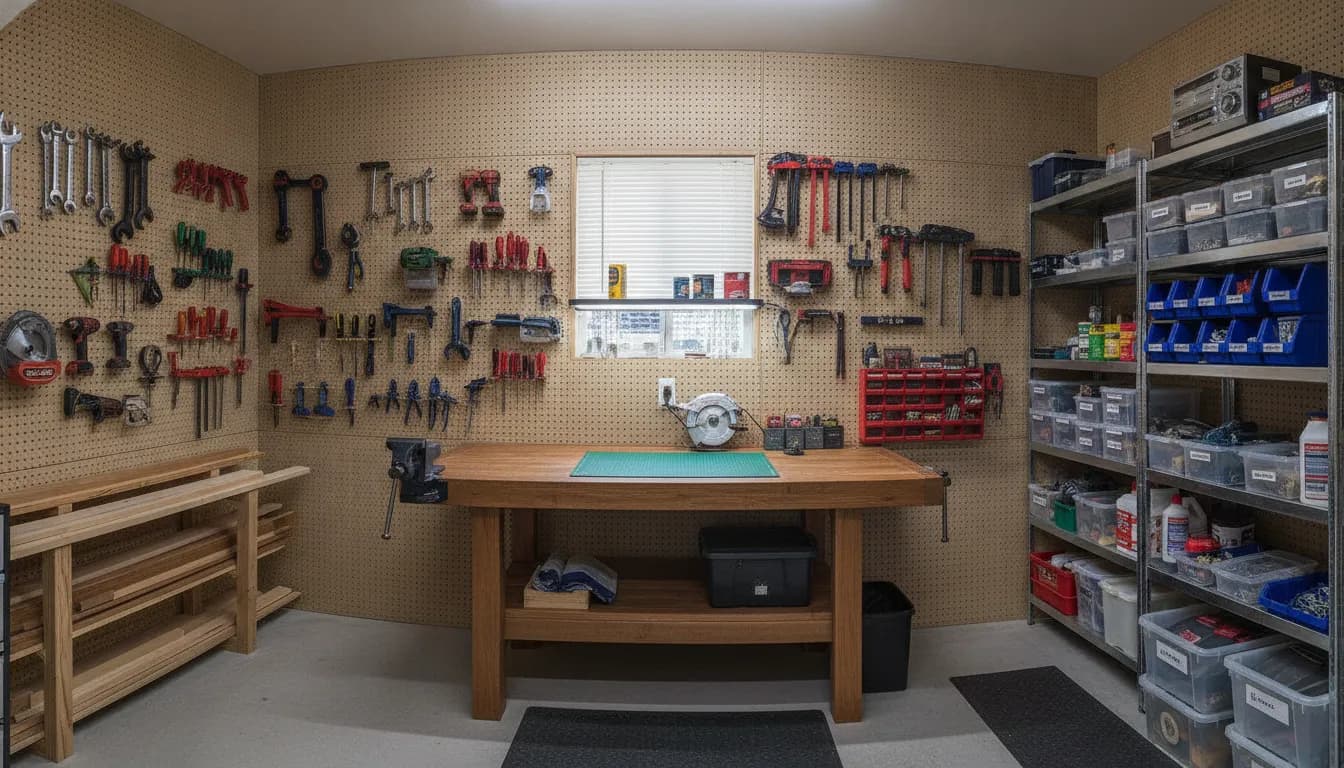
Tripping over a rusted lawn mower in a messy backyard shed can ruin your weekend project. Turning that messy space into a clean, organized backyard workshop provides a quiet place to build and repair.
Ready to turn your messy shed into a clean, organized workshop? Call (518) 544-2889 for a free consultation and pricing guide.
Good shed organization ideas focus on clearing the floor and creating specific zones for your bench, tools, and gear. Stephen Kanagy, owner of Legacy Structures, explains that a workshop setup starts by moving clutter to vertical shelving and loft spaces. You can then build a sturdy workbench in a bright spot, hang wide pegboards on the walls, and use labeled bins for small hardware. Adding simple upgrades like proper insulation, double-pane windows, and stable ventilation will make your backyard building safe and pleasant for year-round work. These quick steps turn any durable storage building into a safe, useful workspace that keeps noise and messy sawdust away from your main home.
Shed Organization Ideas: Planning Your Shed Workshop Layout
Turning a simple backyard structure into a workspace is a great way to enjoy your hobbies. As Stephen Kanagy, owner of Legacy Structures, explains, storage sheds can be turned into useful workshops (F001). If you want to build the perfect workspace in Washington or Warren county, using smart shed organization ideas will help you make the most of your space. When you choose from our storage shed lineup, you can design a space that fits your exact needs.
Shed size and permits
Before you buy a shed, you must check its size and local rules. If you do general repairs and small hobbies, a 10x12 shed might be enough, but woodworking usually requires a 10x16 or greater area (F020). Before breaking ground, check your local building codes and permits to avoid fines (F019). This simple step keeps your project safe and legal.
Foundation and custom layout
Your next task is site prep. A level concrete pad or packed gravel base is crucial for the long life of your shed workshop (F007). Once this base is ready, you can start customizing your utility shed with the right door sizes and window spots (F015). Adding windows brings in great natural light and helps your project flow.
Steps to design your workshop
To begin, Stephen Kanagy recommends drafting a rough sketch on paper first. This simple drawing shows you where everything will go before you start to build. Follow these five steps to plan your workshop layout:
- Step 1: Map your tools. Planning a shed layout around your own tools can help your workflow (F008). Make sure you have a clear plan for where each big tool will go.
- Step 2: Plan your workbench. Place your main work table near a window to use natural light. This setup keeps your work area bright and reduces the need for extra electric lights.
- Step 3: Add vertical storage. To keep your workspace safe, Stephen Kanagy suggests using shelves to keep tools off the floor (F006). As shown by the University of Minnesota Extension, storing supplies on shelving keeps your workspace clear and avoids hazards.
- Step 4: Create distinct zones. Keep your messy jobs, like cutting or painting, away from your clean project areas. This layout makes cleaning much easier and protects your finished crafts.
- Step 5: Run power lines. Plan where to put your power outlets near your benches. This helps you plug in your tools without stretching cords across the floor.
Choosing the Right Shed for Workshop Conversion
With smart planning, you can easily turn storage sheds or garages into working shops, as noted by Stephen Kanagy of Legacy Structures. Having a quiet space for your hobbies keeps dirt and noise out of your main home.
Shed styles and workshop needs
Choosing the right building style is the first step to turn a shed into a workshop. Stephen Kanagy, owner of Legacy Structures, notes that different projects need different spaces. For example, our utility sheds have eight-foot sidewalls that give you plenty of headroom to stand and hang tools. If you store lumber or ladders, a lofted barn is great for maximizing vertical storage space to keep the floor clear.
For heavy machines or vehicles, a portable garage with strong floors is the best fit. Choosing the right design makes it much easier to use your shed organization ideas. When your tools are easy to reach, your projects will go faster and run smoothly.
Customization and the 3D builder
Every workshop setup is unique, so a basic stock shed may not work for your tasks. Stephen Kanagy explains that you can customize your building with specific door sizes and window placements to get better natural light and a smoother flow for your work. You can place doors exactly where you need to bring in large wood boards or tools.
To design your perfect setup, use our online 3D shed builder tool to choose doors, windows, and colors in real-time. Safety should also be a priority when planning your shop. The University of Minnesota Extension reports that proper storage prevents floor clutter, which minimizes physical hazards in a workspace. A customized shed allows you to build enough shelves and tool walls to keep the floor clean.
Sizing guide for your workspace
Choosing the right size is critical for a functional workspace. For general repairs and small hobbies, a 10x12 shed might be sufficient. But if you plan to do woodworking or use large tools, you will generally need a 10x16 or greater area. This gives you enough space to set up workbenches and still have room to move around safely.
To support heavy tools and projects, you need a shed built with superior materials. Every Legacy Structures building is built with ring-shanked galvanized nails and 5/8-inch treated floor decking to hold heavy equipment. We back our buildings with a 5-year warranty, which exceeds the typical one-to-two-year industry standard. Our sturdy buildings are designed to serve Warren, Washington, Saratoga, and Essex counties for decades.
Maximizing Vertical Storage with Shelving and Loft Space
A clean floor is the first step to a safe and useful shed workshop. When you let tools and gear pile up at your feet, your work area gets small very fast. Stephen Kanagy, owner of Legacy Structures, notes that you must use your walls to keep your work area clear.
Using Lofts for Large Gear
To get the most space, you can start with a lofted barn. A lofted barn design gives you great room above, which keeps your main floor open for big projects. If you want to check out these designs, you can view our lofted barn collection. You will get plenty of space to store long boards, ladders, and holiday gear out of your way.
Using both vertical and horizontal storage is the best way to run an active workspace. By putting large, light gear in the loft, you keep your work benches clear and ready. Stephen Kanagy says this setup prevents you from losing work space to bulk items. When you plan a layout, you should always place items you do not use often in these high spots.
Wall Shelves and Heavy Racks
Adding deep wall shelves and heavy racks is also a smart choice. Using vertical storage in your shop maximizes your floor area for big tools and work benches. You can build wood shelves or buy metal racks to hold heavy power tools and storage bins. If you need tips on maximizing vertical storage space, look at how shelves can turn bare walls into useful zones.
Putting items on shelves also keeps you safe. A workspace report by the University of Minnesota Extension shows that keeping your supplies on shelving prevents floor clutter and reduces hazards. If you leave tools and wood on the floor, they can get damaged or make you trip. Sturdy wall shelves keep your floor clean and make it easy to find what you need.
Pegboards for Tool Layouts
Wall hooks and pegboards are also great shed organization ideas. Putting your tools on hooks and pegboards is key to getting the most storage space in a small room. You can hang saws, hammers, and drills right above your work bench. This keeps your hand tools in sight and within reach while you work.
To make your shop work well, organize your wall space by how often you use each tool. Keep your daily hand tools at eye level right in front of you. Place tools you use less often on high hooks or shelves. This simple plan saves you time and keeps your main work area neat and ready for any project.
Setting Up Your Workbench and Tool Organization
Setting up a clear workspace in your workshop starts with the workbench. This area is the hub of all your projects. When you plan a layout, you should design the workspace around your own tools to make your workflow smooth. Place it well.
Placing the bench near a window can give you great light during the day. Stephen Kanagy, the owner of Legacy Structures, suggests choosing a strong wood bench that can handle heavy jobs. If you are customizing your utility shed, you can select the best spot for windows and doors.
Smart Workbench Placement
Where you put your workbench affects your whole day. You must have enough room to move around the table as you build. Keep the space around the bench clear of wood scraps, tools, and trash. Stephen Kanagy says that a clean floor is the first step to safety in any workspace.
Good shed organization ideas can turn a messy bench into a clean work zone. Group your tools in plastic tubs by type. Put items you use most often in top drawers or on open shelves to save time. These tubs are cheap and make it simple to find your gear.
Pegboards and Wall Storage
Using your walls is key to a clean workshop. Pegboards are perfect for hanging hand tools like hammers, saws, and wrenches. Arrange them by size to find what you need in seconds. You can outline each tool on the board so you know where it goes when you clean up.
Keep your gear off the floor to prevent trips. Maintaining organized storage for tools on strong shelves keeps your workspace clear and safe from physical hazards. Hooks and shelves also keep cords and hoses out of your way. This simple wall setup helps you use every inch of your shed.
Bins, Drawers, and Small Hardware Storage
Small parts can quickly clutter your workbench if they do not have a home. A smart shed organization plan must include set spots for small hardware like nails, screws, and fasteners. Use clear plastic tubs and small jars to keep them in check. Label each bin so you know exactly what is inside.
Drawer liners keep tools from sliding when you open and close drawers. This simple step keeps your drawers neat and protects your tools from damage. By setting up clear zones for tool types, your workspace stays tidy and ready for projects. You will feel proud of how much you can get done in a well-set space.
Essential Lighting, Electrical, and Flooring Upgrades
When you search for shed organization ideas to set up a workshop, you must look beyond basic shelves. You need to upgrade your lighting, power, and floors to make the space safe and useful.
Overhead and task lighting
Proper lighting in a workshop shed is key for safety and project quality, and you must plan it well. Overhead LED shop lights give clean, bright light that covers the whole room and clears up dark spots. You should also add small task lights over your workbench to help with detail work. Good lights help you see clearly and avoid mistakes when using sharp tools.
Power access and outlets
A working shop needs power. Clear access to electricity and water in a workshop shed is vital for powering tools, as noted in this University of Minnesota guide. You should place outlets every few feet along your walls, higher than your workbench, to make plugging in tools easy. Planning your power outlets early prevents messy power cords on the floor.
When setting up your power plan, think about your daily workflow. You might need extra breakers for heavy machines so you do not trip the power. If you plan to wash tools or use a sink, keep your water outlets away from the power sources. These steps make your workspace both safe and easy to use.
Stable flooring and foundation level
You need a solid floor for heavy benches. Plywood floor decking works well, but a concrete floor is best for heavy metal tools. According to the same college study, a proper floor prevents mud and debris from tracking in, which keeps your workspace clean. Dust is easier to sweep off a flat, smooth surface.
Choosing the right floor surface depends on what you build:
- Plywood decking gives a warm, soft surface that is easy on your feet.
- Concrete gives the strongest support for heavy machines and wood saws.
- Rubber mats can be added on top of wood floors to prevent slips.
A great floor starts below the shed. A level concrete pad or gravel base is crucial for a shed workshop, as highlighted by pros. A stable base ensures a long-lasting workshop and keeps your doors aligned. Without site prep, your building can sag and sink over time.
Stephen Kanagy, owner of Legacy Structures, says to use expert setup. If you are customizing your utility shed, our team offers professional installation with two-foot leveling to give you a fully flat foundation. This careful setup ensures your building stays strong for years to come.
Climate Control for Year-Round Workshop Use
As Stephen Kanagy, owner of Legacy Structures, notes, adding insulation to your building is the key step for year-round comfort. If you want to use your workspace in winter and summer, you need to block the heat and cold. When you research customizing your utility shed, don't forget climate control as one of your main shed organization ideas. Adding good insulation turns a simple cold shed into a cozy, functional workspace.
Insulating your workshop
You have two main choices for shed insulation. Fiberglass batts are cheap and easy to place between wall studs. Foam board is another great choice that blocks air leaks well. Proper insulation and vents are essential for using a workshop shed all year long. This smart step also keeps moisture away and protects your metal tools from rust. It stops your wood stock from warping and keeps glues from freezing. With these barriers in place, your supplies stay safe and dry.
Ventilation and air flow
Good air flow is just as important as insulation. Proper ventilation helps you manage sawdust and fumes to create a safer work space. You can use ridge vents along the roof and gable vents on the side walls to let hot air escape. Windows that open also let fresh air flow through your shop. If you do heavy woodworking, you should add a small exhaust fan to clear out fine dust.
Powering your climate control
To run heaters, air conditioners, or fans, you need a reliable power source. Having clear access to electricity is vital for powering these climate systems and running your tools. Once your shed has power, you can use a small heater in the winter or a window AC unit in the summer. This setup lets you work on your projects without freezing or sweating. Planning these power lines early will make your workspace cozy for years.
Small Parts Storage and Hardware Organization
Loose nails, screws, and bolts can quickly clutter your work area. When you are customizing your utility shed, thinking about smart shed organization ideas and small parts storage is vital. A tidy workspace lets you focus on your projects without stress. It also makes it much easier to find the exact tool or hardware you need for a task.
Shed safety and hardware storage
Without proper shelving, small hardware often ends up on the floor where it creates safety hazards. You can easily slip on loose screws or step on sharp nails. According to a University of Minnesota Extension guide, keeping tools and supplies on shelves keeps workspaces clear and minimizes these dangers. A good plan always includes a safe, special spot for storing your nails, screws, and bolts.
Comparing common storage methods
There are many ways to sort small parts in your shed. The best choice depends on your budget, space, and how often you use your tools. Choosing the right method keeps your workbench clean and ready for work. Here is how four popular options compare:
| Storage Method | Pros | Cons |
|---|---|---|
| Mason jars on shelves | Low cost, easy to see what is inside | Glass can shatter if dropped on the floor |
| Plastic drawer organizers | Many small slots, neat and tidy look | Drawers can spill if you pull them too far |
| Magnetic strips | Saves shelf space, quick to grab and use | Only works for steel and metal items |
| Compartment bins | Easy to carry, stackable and clean design | Takes up flat shelving space |
Tips for easy hardware retrieval
Once you select your storage style, labeling is the next step. Clearly marked bins save you time when looking for specific sizes of screws or nails. You can use simple tape and a dark marker to label each drawer or jar. Grouping similar parts together in one place also keeps your workshop running smoothly.
Safety, Maintenance, and Long-Term Care
Your workshop is a busy space, so safety and upkeep are vital. Good shed organization ideas must go beyond where you hang your tools. They must also protect your building and keep your workspace safe.
Benefits of separate workspaces
Moving your projects to a backyard workshop keeps sawdust, noise, and fumes away from your home. This distance protects your family from breathing in fine dust and keeps your house quiet. It also gives you a quiet zone where you can focus on your craft. As Stephen Kanagy, owner of Legacy Structures, explains, keeping messy tasks in a separate building prevents tracking grit into your home. It also ensures that toxic fumes from paint or glue do not enter your family living areas. This makes your workspace a healthier place to spend your time.
Floor load and structural care
Before you place heavy equipment, check your building specs. Storing big woodworking tools or heavy lumber means checking the floor weight limit to prevent damage. Legacy Structures designs its buildings for high strength, featuring premium materials like ring-shanked galvanized nails and treated floor decking. Stephen Kanagy points out that these features, backed by a five-year warranty, create a strong base for heavy tools. But you must still plan your layout to spread the weight. Checking your floor load capacity is vital if you run heavy saws or store metal stock. Stephen Kanagy advises that placing heavy benches near the walls helps transfer the weight to the main skids. This layout reduces stress on the floor joists and keeps your workshop building level.
Surface care and pest prevention
Keeping your workspace clean prevents health hazards and structural decay. You should choose smooth, easy-to-clean surfaces to keep your workshop organized and safe. It is wise to avoid raw wood or pitted surfaces because they can harbor fine dust and bacteria. A study from the University of Minnesota Extension notes that rough spots are hard to sweep and can collect dirt. A weekly cleaning plan and pest checks will keep your storage sheds in top shape for years.
Frequently Asked Questions
How do you properly organize a shed workshop?
To organize your workspace, start by dividing the room into zones based on your tools and tasks. Group similar items together and place your workbench near a window for natural light. Use pegboards and magnetic strips to keep frequently used hand tools within easy reach. Placing heavy machines on mobile bases lets you roll them out of the way when you need more floor space.
What items should you not store in a backyard shed?
You should not store items that are sensitive to extreme heat, cold, or moisture. This includes paper files, photos, paint, gas cans, and fabric. Food and seeds should also be kept out of your shed to avoid attracting pests. For safety, keep chemicals in their original containers and never store them near your heat sources or power tools.
How do you organize the inside of a shed for safety?
To keep your work area safe, make sure all walkway paths stay completely clear. Storing tools and raw materials on high shelves or wall hooks keeps them off the floor where they can cause trips and falls. In fact, a study from the University of Minnesota Extension shows that using sturdy shelving prevents dangerous clutter and keeps supplies clean. Always place heavy objects on lower shelves.
Can you turn a 10x12 shed into a workshop?
Yes, a 10x12 shed is a great size for a small workshop. According to a guide by QS Buildings, this size works well for general repairs and hobby crafts. However, large woodworking projects often need more space. To organize it, mount folding workbenches to the walls and use vertical pegboards to save your floor space.
Are you ready to design and build your new custom shed workshop?
Leaving your tools and hardware in a cluttered backyard shed makes your daily work slow, raises the risk of damage, and wastes your valuable time. If you keep putting off your workshop plans, you will spend another season struggling to find what you need in a dark and crowded space. Our storage shed lineup can help you design a clean, dry, and durable workspace ready to use in just a few short weeks.
Ready to build and organize your backyard workshop? Call 518-544-2889 to talk to Stephen Kanagy at Legacy Structures and get a free consultation to plan your custom workshop today. We also offer free delivery within thirty miles.