
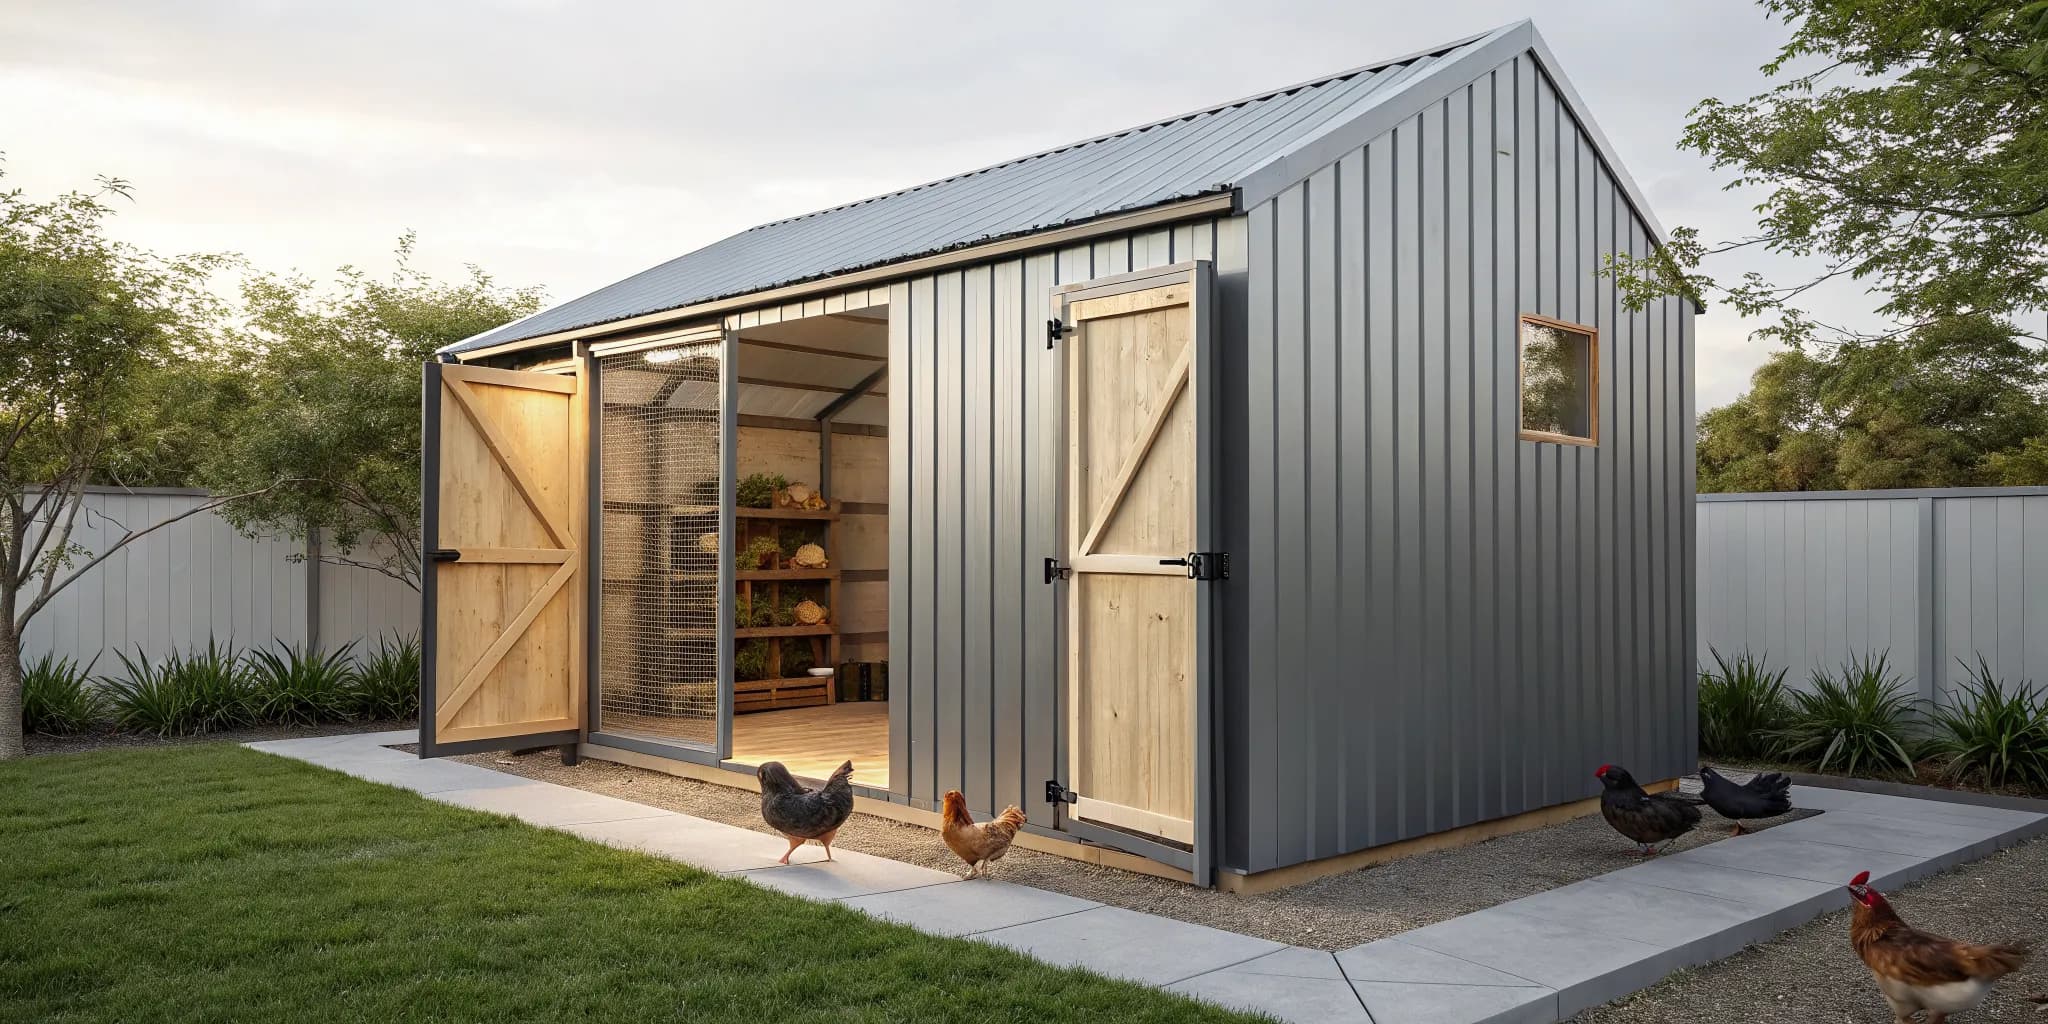
When you bring chickens into your life, your number one job is to keep them safe. A sturdy metal shed seems like a great starting point for a coop, offering a strong defense against wind and rain. But when it comes to clever predators like raccoons and weasels, a basic shed has weaknesses. These animals are persistent and can exploit any small gap or flimsy latch. Before you move your flock in, you need to turn that shed into a fortress. This article will show you exactly how to reinforce every entry point and protect your flock, ensuring your metal shed chicken coop is completely secure.
Key Takeaways
- Prioritize Ventilation and Insulation: A metal shed requires modifications to be safe for chickens. Add insulation to control extreme temperatures and install vents for cross-ventilation to prevent moisture and keep the air fresh.
- Fortify Against Predators: A shed needs significant reinforcement to be secure. Use 1/2-inch hardware cloth on all openings, install complex latches that raccoons can't solve, and add a buried wire apron to stop digging predators.
- Calculate the Full Investment: A DIY conversion involves more than just the shed's price. Factor in the cost of insulation, hardware, and flooring, plus the time you'll spend on the project, to decide if it's the right choice for you over a ready-made coop.
Why Use a Metal Shed for a Chicken Coop?
If you have an old metal shed on your property or are looking for a cost-effective start to your chicken-keeping adventure, converting a shed into a coop can seem like a great idea. A metal shed offers a solid, pre-built structure that can save you from building something entirely from scratch. It provides a blank canvas that you can customize to fit your flock’s specific needs.
However, turning a structure designed for storage into a safe and comfortable home for living animals requires some careful thought and modification. Before you start drawing up plans for roosting bars and nesting boxes, it’s important to weigh the pros and cons. Understanding the benefits and potential challenges will help you decide if this DIY project is the right fit for you and your future flock. Let’s walk through what makes a metal shed an interesting option and what you’ll need to look out for.
Protection From the Elements
One of the biggest jobs a coop has is to keep your chickens safe from rain, wind, and snow. A well-built metal shed provides a sturdy frame and a solid roof, giving you a great starting point for a secure shelter. Unlike flimsy, store-bought coops, a quality shed won’t easily be damaged by falling branches or harsh weather. This durable shell is the foundation of a safe home for your flock.
However, a simple metal box isn't enough. Chickens need excellent ventilation to stay healthy and prevent respiratory issues. Good airflow keeps the coop cool in the summer and reduces moisture buildup in the winter. While a metal shed offers structural protection, you will need to add windows and vents to create the cross-ventilation your birds require to thrive. Starting with one of our storage sheds ensures you have a high-quality, durable structure to build upon.
A Budget-Friendly Choice
Let’s be honest, cost is a major factor when starting any new project. Metal sheds are often more affordable upfront compared to their wood or plastic counterparts, making them an attractive option for a DIY coop conversion. If you’re working with a tight budget, using a metal shed can help you allocate more of your funds toward interior features like feeders, waterers, and high-quality bedding.
This approach allows you to get a spacious coop for your flock without the high price tag of a custom-built wooden structure. For many chicken keepers, the initial savings make the extra work of conversion worthwhile. If you're looking for ways to manage the initial investment, our Rent To Own program can make getting started even more accessible, allowing you to get the right structure now and pay over time.
Potential Downsides to Consider
While a metal shed has its perks, it also comes with a few significant challenges you need to address. The biggest concern is temperature control. Metal heats up very quickly in direct sunlight, and a poorly ventilated shed can become dangerously hot for your chickens in the summer. Conversely, it can get extremely cold in the winter without proper insulation.
Rust is another issue. Chicken droppings are acidic and can cause metal to corrode over time, especially where the walls meet the floor. This can create sharp edges and structural weaknesses. Finally, if you decide a conversion project isn't for you, exploring our ready-made chicken coops can provide a safe, comfortable, and durable home for your flock without the extra work. The following sections will guide you on how to solve these exact problems.
How to Convert a Metal Shed into a Chicken Coop
Once you have your shed, it’s time to transform it into a functional and safe home for your flock. This conversion process focuses on a few key areas: modifying the structure for comfort and safety, adding essential interior features, and creating a clean, dry floor. Taking the time to get these steps right will ensure your chickens are happy and healthy in their new space. Starting with a sturdy metal storage shed gives you a fantastic blank canvas for your project.
Make Key Structural Modifications
Your first priority is to adapt the shed for your chickens' well-being. Metal can get hot, so start by painting the roof white to reflect sunlight and keep the interior cooler during sunny days. Next, focus on ventilation. Chickens require excellent airflow to stay healthy, so you’ll want to add multiple windows and vents. Placing them high on the walls allows hot air to escape effectively. Make sure these openings are covered with strong hardware cloth, not just chicken wire, to keep predators out. A secure structure is non-negotiable for protecting your flock from raccoons, weasels, and other threats.
Install Nesting Boxes and Roosts
With the main structure ready, you can add the interior furnishings. Your hens will need private, cozy spots to lay their eggs. You can create simple nesting boxes from storage containers by cutting an entry hole in the front. Just be sure to add a small wooden perch at the entrance for easy access. For sleeping, your chickens will need roosts. You can use thick tree branches or smooth 2x4s installed horizontally. Using wider roosting bars is better for their feet and helps prevent health issues like bumblefoot. Arrange the roosts higher than the nesting boxes to encourage your chickens to sleep on them instead of in the boxes.
Set Up Proper Flooring and Drainage
A clean coop starts from the ground up. If your shed has a wooden floor, consider replacing it to prevent moisture damage and make cleaning easier. A great option is to lay down pavers with gravel in between to allow for excellent drainage. You can then cover this base with a thick layer of sand or pine shavings, which are easy to spot-clean daily. A dry floor is essential for preventing respiratory problems and keeping your flock healthy. If this level of DIY feels like too much, you can always explore ready-made chicken coops that have these features built right in.
How to Manage Ventilation and Temperature
Metal is a fantastic, durable material, but it heats up quickly in the sun and gets chilly in the winter. That’s why managing the temperature and airflow inside your shed-turned-coop is one of the most important jobs you’ll have as a chicken keeper. A well-ventilated coop keeps your flock cool in the summer, dry in the winter, and healthy all year long by preventing respiratory issues caused by moisture and ammonia buildup. Getting this right from the start will save you a lot of worry later. Let’s look at the key steps to creating a comfortable and safe environment for your chickens.
Create Airflow with Cross-Ventilation
The best way to cool down a coop is with a steady breeze. You can achieve this by creating cross-ventilation. This simply means having openings on opposite sides of the shed to allow air to flow through freely. Installing windows or vents across from each other will create a natural draft that pulls hot, stale air out and brings fresh air in. When you’re designing your structure, you can plan the placement of windows and vents to maximize this effect, ensuring your flock has a constant supply of fresh air during those warm summer months.
Keep Your Flock Comfortable in Any Weather
Chickens are happiest and healthiest when their environment stays below 85 degrees Fahrenheit. A metal shed can easily surpass that temperature on a sunny day, so active monitoring is key. Proper ventilation is your first line of defense against overheating. However, you also need to consider the cold. While chickens are fairly cold-hardy, a metal shed offers little natural insulation. Your goal is to create a space that stays cool enough in the summer and warm enough in the winter without being drafty or damp. Many chicken keepers have successfully used metal sheds by focusing on these temperature regulation strategies.
Insulate for Year-Round Comfort
Insulation is a non-negotiable step for a metal shed coop. It’s the key to moderating those temperature swings, keeping the interior cooler in the summer and warmer in the winter. Without it, the metal walls will radiate intense heat or become frigidly cold. Rigid foam board is a popular and effective choice for insulating walls and ceilings. You can cut it to fit snugly between the shed’s framing. Some people also use reflective foil insulation, which helps block radiant heat. A well-insulated coop provides a stable environment, protecting your flock from stress and illness.
Prevent Moisture and Condensation
Good ventilation does more than just control temperature; it’s also crucial for managing moisture. Chickens release a surprising amount of moisture through their breath and droppings. In a poorly ventilated space, this moisture condenses on the cool metal walls, leading to dampness, mold, and a buildup of ammonia fumes. This combination can cause serious respiratory infections. To prevent this, ensure your coop has plenty of vents placed high up on the walls. This allows warm, moist air and ammonia to escape, keeping the air fresh and the bedding dry. This simple step is fundamental to maintaining a healthy flock.
How to Predator-Proof Your Metal Shed Coop
Keeping your flock safe is the most important part of raising chickens. A sturdy metal shed provides a fantastic starting point, but predators are clever and persistent. Raccoons, weasels, hawks, and foxes are common threats, and they will exploit any weakness they can find. Taking the time to properly predator-proof your converted coop will give you peace of mind and keep your chickens from becoming a midnight snack.
The key is to think like a predator. Examine every inch of your structure from their perspective. Can you squeeze through that gap? Can you pry that open? Can you dig underneath? A secure coop is a fortress with no weak points. While our purpose-built chicken coops come ready-made with these features, you can absolutely fortify a metal shed yourself. It just takes the right materials and a little bit of work to make it completely secure.
Reinforce All Entry Points
Your first step is to identify and secure every potential opening. This includes the main door, windows, ventilation holes, and any small gaps where panels meet. A determined weasel can squeeze through a hole the size of a quarter, and a raccoon can reach through surprisingly small openings. Walk around and inside your shed, making a list of every spot that needs reinforcement.
Remember that standard chicken wire is designed to keep chickens in, not to keep predators out. A raccoon can tear right through it. You’ll need a much stronger material for any openings. A solid structure is your best defense, so starting with a well-built storage shed means you'll have fewer gaps to worry about from the get-go.
Install Hardware Cloth Correctly
Hardware cloth is your best friend when it comes to predator-proofing. This rigid, welded wire mesh is the material you need to cover all your vents and windows. For the best protection, use 1/2-inch hardware cloth, as it’s small enough to stop even the smallest predators. As one chicken keeper put it, you should frame any openings, like windows and doors, with this strong wire to keep your flock safe.
When installing it, don't just use staples, which can be pried out. Secure the hardware cloth to the shed's frame using screws and washers for a hold that a predator can't easily undo. Overlap the edges of the cloth with the frame to ensure there are no tiny gaps for a predator to exploit.
Protect the Coop from Digging Predators
Some of the most determined predators will try to get in from below. Foxes, dogs, and even raccoons are notorious diggers. To stop them, you need to create an underground barrier around the perimeter of your coop. The most effective method is to install a "dig skirt" or "apron" using the same 1/2-inch hardware cloth.
To do this, you’ll need to bury the hardware cloth at least 12 inches deep around the entire base of the coop. You can also lay the wire flat on the ground, extending it 12 to 24 inches out from the walls and securing it with landscape staples. When a predator tries to dig at the base of the coop, they’ll hit the wire and give up.
Choose Secure, Predator-Proof Latches
Raccoons have incredibly dexterous paws and can figure out simple slide bolts and hook-and-eye latches in no time. Your coop doors and nesting box lids need latches that require more complex actions to open. Look for two-step latches, spring-loaded eye hooks, or even simple carabiner clips that can be passed through a lockable latch for an extra layer of security.
Make sure your doors and hatches fit snugly within their frames, leaving no gaps larger than a quarter-inch for a predator to pry open. A secure latch on a flimsy door won't do much good. By ensuring every access point is fitted with a complex, strong lock, you can rest easy knowing your flock is protected by more than just a simple hook.
How to Maintain Your Converted Coop
Once your chickens have moved into their new metal shed coop, your job shifts from builder to caretaker. Consistent maintenance is the secret to keeping your flock healthy and ensuring your coop stands strong for years to come. A little bit of upkeep goes a long way in preventing bigger problems down the road. By creating a simple routine for cleaning, inspections, and seasonal adjustments, you can make sure your feathered friends have a safe and comfortable home.
Your Daily Cleaning and Health Checklist
A clean coop is essential for a healthy flock. Your daily routine can be quick: just spot-clean any droppings and remove wet bedding to keep things fresh. Once a week, set aside time for a deeper clean. Move your chickens to a secure area, then put on gloves and a mask. Shovel out all the old bedding and droppings. Next, wash the floors, walls, and nesting boxes with a simple solution of warm water and mild soap. For a great natural disinfectant that also tackles odors, a mix of white vinegar and water works wonders. This simple habit prevents the buildup of harmful bacteria.
Monthly Rust and Repair Inspections
Metal sheds are incredibly durable, but it’s smart to give yours a quick inspection each month to catch any potential issues. Walk around the coop and look for any orange or brown spots, which are early signs of rust. If you find any, just scrub the area with a wire brush and apply a coat of rust-resistant paint. After a heavy rain, peek inside to check for leaks. Small holes can easily be patched with a bit of waterproof sealant, keeping your coop dry and your chickens cozy. Starting with one of our quality storage sheds gives you a great foundation that’s built to last.
Essential Seasonal Tasks
Your maintenance routine will change a bit with the seasons to keep your flock comfortable. As winter approaches, you’ll want to add insulation. You can attach foam boards to the interior walls and ceiling or stack straw bales along the inside for extra warmth. In the summer, the goal is to keep the coop cool. You can create shade by hanging cloth coverings over the run or planting leafy bushes nearby. Hanging light-colored curtains inside the windows also helps reflect the sun’s heat, giving your chickens a cool place to relax during the hottest part of the day.
Tips for Long-Term Durability
To make sure your converted coop remains secure for the long haul, focus on reinforcing it from the start. Use hardware cloth, which has small, sturdy squares, on all windows and vents instead of chicken wire, as it’s much stronger against predators. Attach it securely with screws. You should also seal any small cracks or openings with caulk or foam to eliminate drafts and keep pests out. Adding weatherstripping around the door is another easy way to make the coop snug and secure. We stand by the durability of our buildings, which is why they come with a 5-year warranty.
Is a DIY Coop Conversion Right for You?
A DIY shed-to-coop conversion can be an incredibly rewarding project, giving you a custom home for your flock that you built with your own hands. But before you grab your toolbelt, it’s wise to consider if this path is the right one for you. The decision involves more than just your handyman skills; it’s a balance of your budget, your available time, and the specific needs of your chickens. Taking a moment to weigh the pros and cons of a DIY project against a ready-made solution will help you make a choice you’ll be happy with for years to come. This isn’t just about building a coop, it’s about creating a safe and healthy environment for your birds. Let’s walk through the key factors to help you decide.
Ready-Made Coops vs. a DIY Project
Many chicken keepers have successfully transformed old metal sheds into cozy coops, proving it’s a perfectly viable option. If you have a shed already sitting in your backyard, upcycling it is a fantastic way to be resourceful. However, it’s important to compare this DIY route with purchasing a structure built specifically for poultry. Our ready-made chicken coops are designed from the ground up with a flock’s needs in mind, featuring proper ventilation, easy-to-clean surfaces, and secure nesting areas already built-in. The choice really comes down to your personal preference: do you want the creative freedom of a blank canvas, or the peace of mind and convenience that comes with a purpose-built home for your flock?
Compare the Costs and Time Investment
At first glance, converting a metal shed seems like a budget-friendly choice, especially if you find one for cheap or already have one on your property. However, the initial cost is only part of the financial picture. You’ll need to factor in the price of materials for insulation, ventilation, flooring, roosting bars, and nesting boxes. You will also need to add hardware cloth for predator-proofing. These additional expenses can add up quickly, sometimes rivaling the cost of a pre-built coop. Don’t forget to account for your time, too. A conversion project can take several days or weekends to complete. It’s important to be realistic about the commitment before you start.
The Advantage of Starting with a Quality Shed
If you decide the DIY conversion route is for you, the quality of the shed you start with will make all the difference. A flimsy, rusted shed will cause constant headaches, from leaks to structural weakness. Starting with a durable, well-constructed storage shed provides a solid and secure foundation for your project. A quality building is easier to modify, better at keeping predators out, and will stand up to the elements for much longer. Investing in a better shed upfront means less work and worry down the road, ensuring the final coop is a safe, comfortable, and lasting home for your chickens. A structure that comes with a 5-year warranty is a good sign you're starting with a solid base.
Frequently Asked Questions
Can a metal shed truly be cool enough for chickens in the summer?
Yes, it absolutely can, but you have to be intentional about it. A plain metal box will get dangerously hot, so modifications are not optional. The most effective strategies are painting the roof white to reflect sunlight, installing plenty of vents and windows for cross-ventilation, and adding insulation like rigid foam board to the walls and ceiling. With these key steps, you can create a space that stays comfortable for your flock even on warm days.
What's the single most important step I shouldn't skip in this conversion project?
If I had to pick just one, it would be a tie between ventilation and predator-proofing. Poor airflow leads to respiratory illness, and a single weak spot can be a fatal invitation to a predator. You must ensure there is excellent airflow to manage moisture and heat, and you must use 1/2-inch hardware cloth (not chicken wire) on every single opening to create a secure fortress. These two areas are directly tied to the health and safety of your flock.
How do I figure out how many chickens can live in my shed?
A good rule of thumb is to provide about 3 to 4 square feet of floor space per standard-sized chicken inside the coop. To figure out your capacity, simply measure the interior length and width of your shed to calculate the total square footage, then divide by four. For example, an 8x10 shed has 80 square feet, which could comfortably house around 20 chickens. Keep in mind that more space is always better, as it helps reduce stress and keeps the coop cleaner.
Is converting a shed actually cheaper than buying a chicken coop?
It can be, but not always. While the initial cost of a used or basic metal shed might be low, you need to carefully budget for all the conversion materials. The price of insulation, hardware cloth, lumber for roosts, nesting boxes, and secure latches can add up. I recommend pricing out all your supplies and comparing that total cost, plus the value of your time, to the price of a purpose-built coop. Sometimes the convenience and built-in features of a ready-made coop are worth the investment.
What if I'm not very skilled with tools? Is this project too difficult?
Many parts of this project, like painting or assembling simple roosts, are very beginner-friendly. The more challenging tasks involve cutting into the metal shed to install windows and vents. If you're not comfortable with that, it might be a hurdle. However, starting with a high-quality, well-built shed makes the job much easier because you're working with a solid, square structure. If you're hesitant about the structural work, a ready-made coop might be a better fit for you.