A shed can hold tools and seasonal equipment well. But using one as a workshop or occasional office in Hudson Falls requires more planning than adding insulation to the walls. Cold air, drafts, moisture, doors, windows, and the roof all affect how comfortable the space feels.
Learning how to insulate a storage shed starts with a realistic goal: insulation can slow heat flow, while air sealing helps limit drafts. Together, with sensible moisture control and safe ventilation, these steps can make a shed more comfortable, but they do not turn it into a fully winterized home. The U.S. Department of Energy explains that insulation and air sealing address different problems: insulation limits heat flow while air sealing limits air movement.
Call Legacy Structures at 518-544-2889 to discuss a shed layout that fits your intended use.
Before choosing materials or closing up wall cavities, it helps to separate what insulation can improve from what it cannot solve. That distinction will guide the rest of your planning, from draft control to ventilation and the type of workspace you want to create.
What Insulation Can and Cannot Do in a Storage Shed
Insulation can make a shed more comfortable by slowing the movement of heat through the walls, roof, and floor. In practical terms, that can help an occupied space feel less affected by outdoor temperature changes. The U.S. Department of Energy explains that insulation limits heat flow, while the material and installation approach determine how well it performs. Common options include batts or rolls, loose-fill, spray foam, and rigid boards, but the right choice depends on the shed's framing, intended use, and available interior space. DOE insulation guidance provides a useful overview of these material types.
Insulation is only one part of the comfort equation. It does not automatically stop drafts. Air sealing addresses unwanted air movement around doors, windows, joints, and other gaps, while insulation addresses heat moving through a surface. The DOE compares insulation to a sweater and air sealing to a windbreaker: one helps retain warmth, while the other helps block moving air. If a shed has noticeable gaps, adding insulation without addressing those gaps may leave the space feeling drafty. See the DOE guide to air sealing for the distinction.
Moisture needs its own plan
A warmer-feeling interior does not mean a shed is automatically dry. Air leaks can carry moisture into building materials, and trapped water vapor can contribute to warped wood, material damage, or mold. Sealing every opening without considering fresh-air needs can also create a moisture problem. Before insulating, inspect for leaks, damp materials, roof or wall issues, and areas where air can move. Plan how the space will receive appropriate ventilation, especially if people will spend extended time inside or if moisture-producing activities are involved.
Set realistic expectations
Insulation does not turn a storage shed into a finished home, guarantee a particular indoor temperature, or replace safe heating and electrical planning. It also does not establish code compliance or prove that a particular assembly is suitable for every use. A shed used for seasonal storage has different needs from one intended as a workshop or hobby space. Start by deciding how the building will be used, then review the walls, roof, floor, doors, air sealing, and moisture control as one connected system. That approach helps you choose improvements for comfort without assuming insulation can solve every building concern.
How to Insulate a Storage Shed Step by Step
A successful insulation project starts with the shed itself, not the insulation product. Work through the enclosure in order so you do not cover a leak, trap moisture, or make future repairs difficult. This educational process can help you plan a practical upgrade, but unusual framing, damp wood, or electrical work deserves evaluation by a qualified professional.
- Inspect the structure first. Look for roof leaks, wet or soft wood, daylight around doors and windows, damaged siding, and gaps at wall and floor joints. Repair water entry and allow damp materials to dry before adding insulation. Insulation is not a substitute for a sound exterior. Also confirm that the shed has enough usable framing depth for the material and finish you are considering.
- Seal obvious drafts. Check door and window edges, corners, trim, and openings for utilities. Use an appropriate exterior-rated sealant or weatherstripping for the location and material. The U.S. Department of Energy explains that insulation limits heat flow, while air sealing limits air movement, so doing one without the other can leave a shed drafty. Air leaks can also admit moisture that damages wood and contributes to mold. Learn more about air sealing from the Department of Energy.
- Plan the floor before the walls. Decide whether the floor needs insulation based on how the shed will be used and how accessible the underside is. Keep insulation dry and protected from pests, ground moisture, and physical damage. Do not bury or freeze a shed base into the ground. Legacy Structures sheds are designed to sit on or above the ground so they can be moved or re-sited. So preserve that clearance and portability while planning any floor work.
- Fit insulation into the walls. Choose a material that suits the available cavities and the interior finish. Common categories include batts or rolls, loose-fill, spray or foamed-in-place products, and rigid boards. The DOE notes that loose-fill can fill irregular spaces, while sprayed products can fill small cavities and rigid insulation is supplied as board material. Follow the product instructions and avoid compressing a material beyond its intended installation method. Review insulation types and heat-flow guidance from the DOE.
- Address the roof or ceiling. Heat can move through the upper enclosure, and roof work has its own access and moisture considerations. Install only where the assembly can remain dry and where ventilation paths will not be blocked. If the roof has a leak, condensation problem, or limited cavity space, correct that condition first rather than simply adding more material.
- Protect moisture control and ventilation. A tighter shed still needs a sensible way to manage moisture. Do not seal over wet framing, block designed vents, or create an enclosed assembly without understanding how it will dry. DOE guidance cautions that proper ventilation matters because excess water vapor can accumulate in an enclosed space. If the shed will contain fuel-burning equipment, combustion appliances, or other hazardous materials, get professional guidance before changing air movement.
- Install the interior finish safely. Cover insulation with a durable interior material appropriate for the space, and protect edges from tools, stored equipment, and pests. Before closing any wall or ceiling, photograph the framing and confirm that every planned cable, box, and opening is accessible. Never modify wiring casually or cover questionable connections. Have a licensed electrician handle new circuits, relocated outlets, or wiring that may contact insulation or finishes.
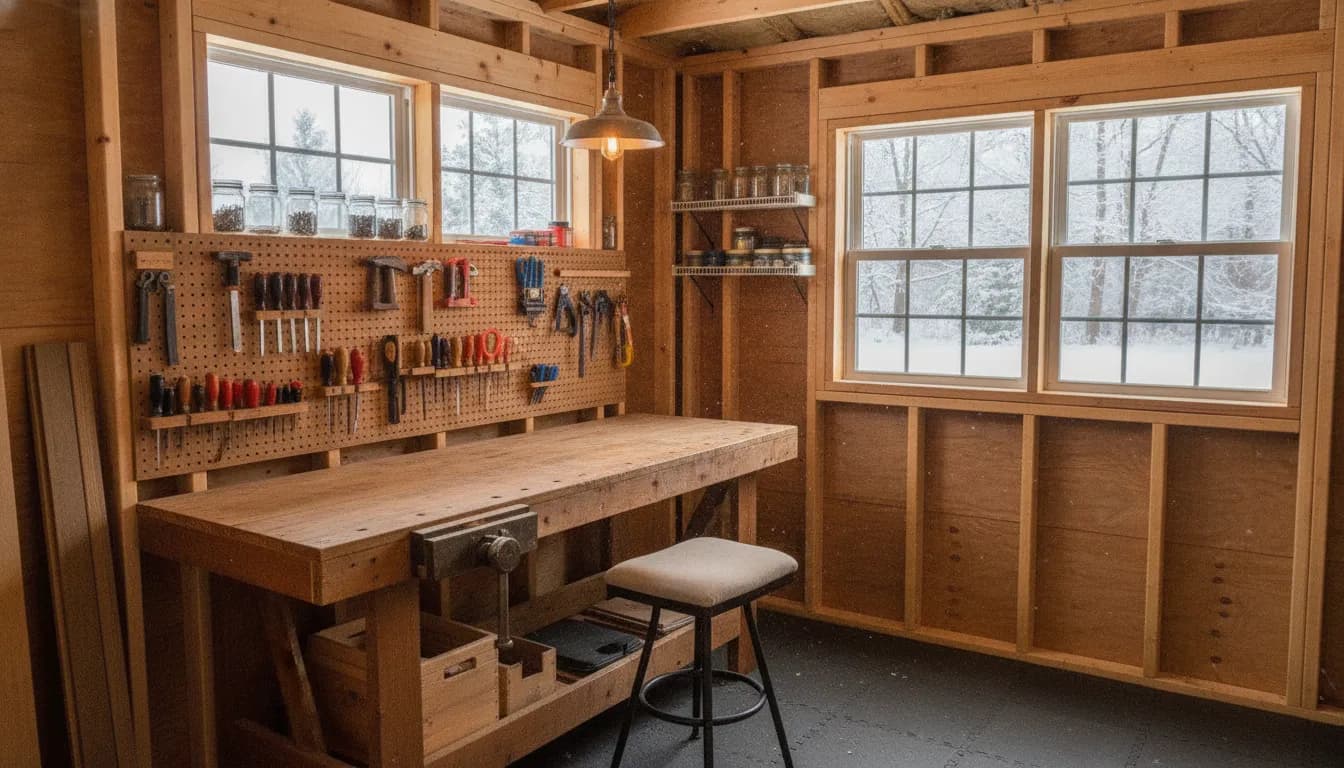
For a future workshop or office, it is often easier to plan wall depth, outlets, windows, and ventilation before delivery. Legacy Structures utility sheds can be configured with sidewalls up to 8 feet. They are described for uses such as workshops and home offices. Review the available storage shed options before finalizing an insulation plan.
Which Insulation Approach Fits Your Shed Use?
The best approach depends less on the word "insulation" and more on what you expect to do inside the shed. A space that protects seasonal equipment has different priorities from a workshop where you spend several hours. Or an office and hobby room that needs a more finished interior. Start with the intended use, then consider the walls, roof, floor, doors, windows, air sealing, and ventilation as one system.
Common insulation materials include batts or rolls, loose-fill, spray or foamed-in-place products, rigid board, and reflective insulation. The U.S. Department of Energy explains that insulation limits heat flow, while air sealing limits air movement, so adding material alone will not necessarily solve drafts. See the DOE guidance on air sealing and insulation before choosing a method.
| Shed use | Practical priority | Approach to discuss | Planning questions |
|---|---|---|---|
| Light seasonal storage | Protect belongings and keep the space orderly without overbuilding it. | Begin with a sound envelope, attention to door and window gaps, and insulation only where it supports the storage goal. | Will the shed remain mostly unoccupied? Are stored items sensitive to temperature or moisture? Can ventilation be maintained? |
| Workshop | Make the shed more comfortable for periodic work while preserving usable wall and ceiling space. | Compare batt or roll insulation with rigid board or another suitable method based on framing, access, and the planned interior finish. Treat air sealing and moisture control as separate decisions. | Where will tools, benches, wiring, and storage go? Will dust-producing work or combustion equipment require professional safety planning? |
| Office or hobby space | Plan for a more finished room, including the floor, ceiling, doors, windows, and fresh-air needs. | Choose the insulation and interior finish together. Confirm the layout and any electrical or heating work with qualified professionals before construction or modification. | How will the room be used in cold weather? What ventilation, electrical, lighting, and moisture-control measures are needed? |
For a workshop or office, planning ahead is usually easier than trying to fit every decision into an existing storage layout. Utility sheds can be configured with sidewalls up to 8 feet and are described as suitable for a home office or workshop. Review the available storage sheds and compare the footprint, doors, windows, siding, and interior plans before deciding how to insulate a storage shed.
There is no universal material or thickness that fits every shed. Climate, framing, intended occupancy, moisture exposure, and any heating or cooling system all affect the decision. Keep the plan realistic: insulation can support comfort, but it does not replace sound construction. Careful air sealing, appropriate ventilation, or qualified advice for electrical, heating, or structural work.
How Upstate New York Weather Changes the Plan
In Hudson Falls and across Upstate New York, a shed may face cold air, snow. Freeze-thaw cycles, and damp shoulder seasons before it ever becomes a comfortable workshop or hobby space. That weather makes the planning stage important. Before delivery, decide whether the building will hold tools and equipment, serve as a seasonal workspace, or need to feel more usable through colder months. The intended use affects where insulation, air sealing, moisture control, lighting, and any future interior finish belong.
Cold weather also makes drafts easier to notice. Insulation slows heat movement through a wall or roof, but it does not automatically stop air from moving through gaps. The U.S. Department of Energy explains that air sealing works alongside insulation by limiting unwanted air movement, much like a windbreaker works over a sweater: DOE air-sealing guidance. In a shed, pay attention to practical trouble spots such as door edges, window frames, corners, and openings created for utilities. Sealing those areas should be planned carefully rather than treated as a last-minute patch.
Snow and repeated temperature changes also make moisture worth considering. A damp interior, wet items brought in from outside, or moisture entering through an unsealed gap can create problems for wood and finishes. The DOE notes that air leaks can let moisture in, potentially contributing to warped wood or mold. That does not mean a shed should be sealed without thought. Ventilation and fresh-air needs still matter, especially if the space will be occupied or heated. EPA moisture guidance is practical building guidance, not a substitute for code or professional advice. Ask a qualified professional when your project involves electrical work, heating equipment, or a more complex conversion.
Planning before delivery gives you more options. Think through the shed's location, door swing, window placement, access for future work, and the surfaces that will need to be finished after delivery. If you are comparing storage sheds for a workshop or future office, discuss the intended use and local weather conditions early. Legacy Structures is based in Hudson Falls and serves the surrounding Washington County and Adirondack region, making local planning part of the conversation before your building arrives.
Should You Insulate an Existing Shed or Plan Ahead?
Yes, you can insulate an existing shed, but planning insulation before construction or delivery usually gives you better access to the walls, floor, and roof. If the shed is already built, first inspect its framing, interior finish, ventilation, moisture condition, and electrical work. The right answer depends less on the insulation material than on whether you can install it continuously without trapping moisture or covering problems.
Start with access and condition
Empty the shed and look for water stains, soft wood, roof leaks, gaps around doors and windows, and signs of condensation. Insulation will not correct a leak. It can hide one and make future repairs harder. Air sealing and insulation also serve different purposes: insulation slows heat flow, while air sealing limits drafts. The U.S. Department of Energy explains that air leaks can allow moisture into building materials, where it may warp wood or contribute to mold. See its air-sealing guidance before closing up an existing structure.
Use a practical installation sequence
For an existing shed, work from the least accessible areas to the most accessible. Address the floor first if it can be reached safely, then the wall cavities, and finally the roof or ceiling. Seal appropriate gaps around openings before adding insulation, but do not block necessary ventilation. The Department of Energy notes that insulation does not necessarily stop air movement, and that ventilation should be considered before extensive air sealing. Its insulation guide describes blankets, loose-fill, sprayed insulation, and rigid boards as different material categories, each suited to different spaces and installation conditions.
Plan the interior finish after you know how the insulation will be supported and protected. Leave room for doors, shelving, outlets, and equipment. If the roof or walls have limited cavity depth. Do not force a material into a space where it will compress, shed fibers, or interfere with drainage and ventilation. Moisture control matters throughout the assembly, especially in a shed used for work or storage through changing Upstate New York seasons.
Know when to bring in a professional
Pause and ask a qualified professional for help if you find wet or damaged framing. Uncertain roof leaks, mold, complicated wall construction, or any electrical work that must be moved or extended. Turn off power before working near wiring, and do not cover questionable connections or fixtures. A professional can also evaluate an existing insulation assembly and help select an appropriate approach without relying on guesses about performance, cost, or local requirements.
How to Choose a Shed for a Future Workspace
If a shed may become a workshop, office, art room, or hobby space later, choose the structure around that future use now. It is much easier to plan wall space, door clearance, and natural light before delivery than to work around those limits after the shed is in place. Insulation is a separate planning decision, so ask what wall and ceiling access you will have if you expect to make the space more comfortable through changing seasons.
Start with the work you want to do
List the largest items that need to fit inside, then add room to move around them. A workbench, mower, shelving, desk, or tool cabinet can consume more floor area than expected. Measure equipment before choosing a footprint, and sketch where each item will go. Keep the main walking path clear, especially if you will carry lumber, garden tools, or finished projects through the building.
Think vertically as well as horizontally. Legacy Structures utility sheds can be configured with sidewalls up to 8 feet. Which can provide useful clearance for shelving, cabinets, and a more open workshop or office layout. A taller wall does not replace careful planning, but it can give you more flexibility as your needs change.
Plan doors, light, and usable wall space
Door placement affects nearly every future decision. Choose an opening that allows your largest equipment to pass through, and consider whether a second access point would make the layout easier to use. Place windows where they can provide natural light without taking away the wall space needed for storage or a workbench. If you are considering electrical work, discuss the plan with a qualified professional before installation and keep future wiring routes in mind.
Siding is another choice to compare while you are selecting the building. Verified options for Legacy Structures utility sheds include T1-11 pressure-treated siding and LP Smart Panel. Available finishes include pressure-treated, painted, or polyurethane options. These are product choices, not a promise that insulation or interior finishing is included, so confirm the exact build details for your design.
Use a design tool before you commit
A visual plan can reveal problems that are easy to miss on paper. Use the 3D shed builder to explore dimensions and options, then compare the result with your equipment measurements and intended workflow. You can also review storage sheds to compare utility, metal utility, and utility dormer models. The right choice is the one that supports today's storage needs while leaving a practical path toward tomorrow's workspace.
Call 518-544-2889 for help comparing a storage shed for your intended use.
Frequently Asked Questions
How do you insulate a shed that is already built?
Start with an inspection for water entry, damaged wood, and noticeable drafts. Seal appropriate gaps around doors, windows, and wall joints before adding insulation. Then plan the wall, ceiling, and floor work around existing framing, wiring, and interior finishes. If access is limited or electrical changes are needed, ask a qualified professional to review the project before closing any cavities.
Should you insulate a storage shed?
Insulation can make a shed more comfortable when you use it as a workshop. Hobby room, or occasional office, but it does not replace heat, cooling, or moisture control. Insulation slows heat flow, while air sealing addresses drafts. The U.S. Department of Energy explains that insulation and air sealing serve different purposes, so plan both according to how you will use the building.
What is the most practical way to insulate a shed on a budget?
Prioritize the areas that affect comfort most, starting with obvious air leaks and the surfaces that lose the most heat in your specific shed. Compare batt or roll insulation, rigid boards, and other suitable materials based on available space and the finish you want. Do not choose by price alone. Material type and R-value affect cost, and actual retail pricing varies, so get a local estimate before buying in quantity.
How much does it cost to insulate a 10x20 shed?
There is no reliable one-size-fits-all figure. The total depends on which surfaces you insulate, material type, R-value, access, air sealing, interior finish, and whether labor is involved. A 10x20 footprint does not reveal the wall height, roof design, openings, or floor condition. Measure the actual surfaces and request itemized material and labor estimates from a local supplier or qualified contractor.
Ready to Plan a More Comfortable Shed?
Insulation works best when the shed's size, layout, ventilation, and intended use are considered together. If you are planning a workspace, workshop, or storage building in Hudson Falls or Upstate New York. A conversation with a shed expert can help you compare practical options before delivery. Review your needs, then call Legacy Structures to discuss a building that fits how you plan to use it.
Call 518-544-2889 to speak with a Legacy Structures shed expert.