
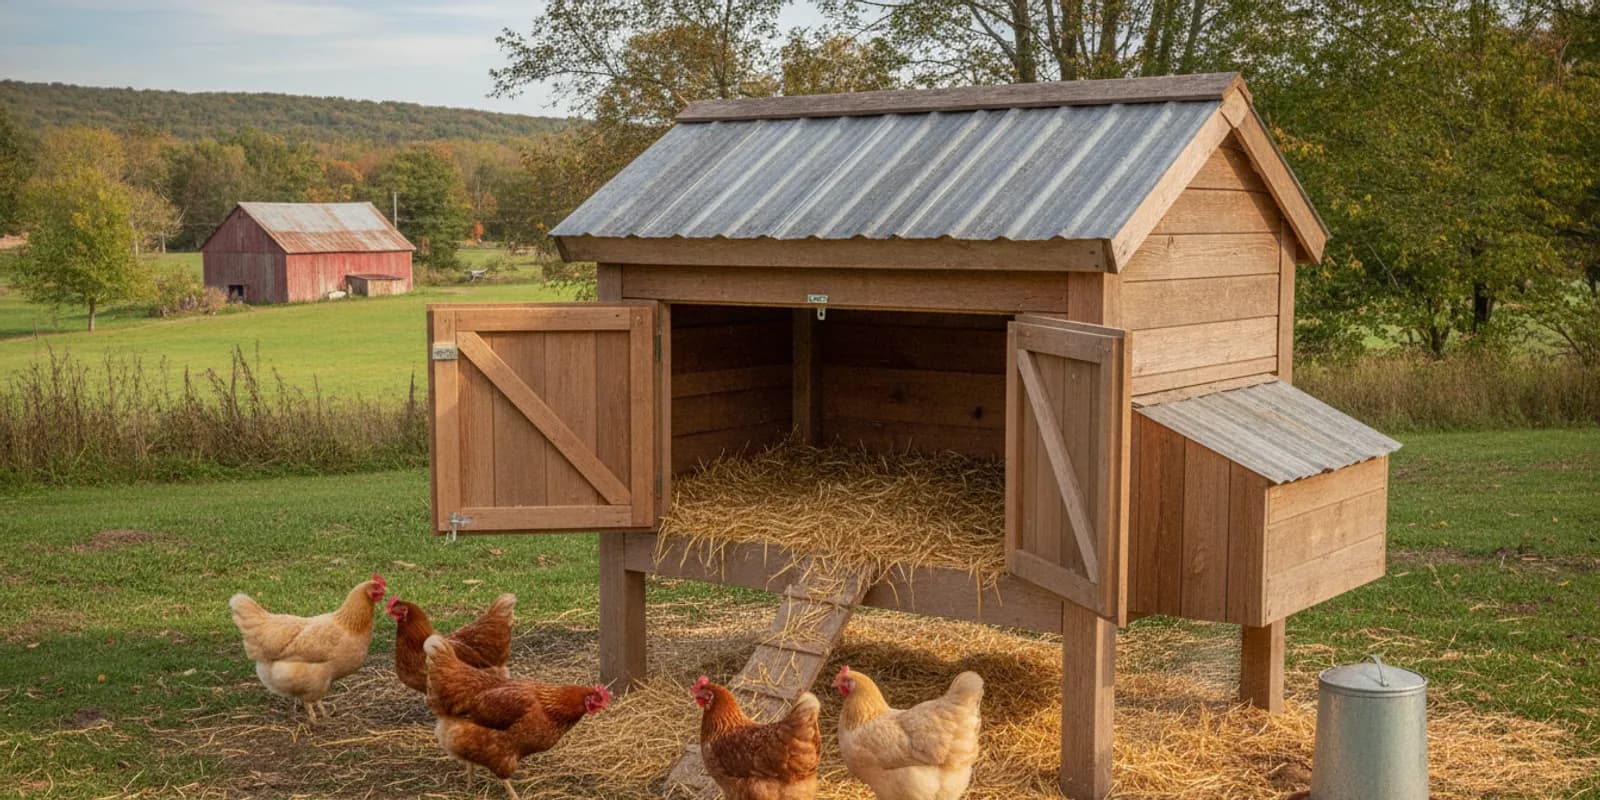
Knowing how to clean a chicken coop starts with a simple rule: remove the birds from the area you are cleaning, take out soiled material, and let every surface dry before the flock returns. A steady routine makes the work easier and helps you spot damp bedding, damaged areas, or feed waste before they become bigger chores.
Ask about chicken coop options
How often should you clean a chicken coop?
There is no single calendar that fits every flock. The right interval depends on the number of birds, coop size, bedding type, weather, and how much moisture gets inside. Start with frequent quick checks, then schedule deeper cleanings based on what you find. A coop that looks and smells dry may need less frequent full cleanouts than one with wet bedding, spilled water, or crowded roosting space.
Use a daily glance to catch immediate problems, such as a leaking waterer or soaked bedding. Remove visibly soiled patches as needed. A weekly pass gives you time to clean feeders and water containers, check corners, and replace damp litter. A full cleanout is appropriate when bedding is heavily soiled, the coop is due for seasonal attention, or you are preparing it for a new group of birds.
| Routine | What to do | What to look for |
|---|---|---|
| Daily glance | Check water, bedding, and ventilation; remove wet or heavily soiled patches. | Spills, leaks, unusual dampness, strong odors, or a blocked vent. |
| Weekly maintenance | Refresh soiled areas and clean feeders and water containers outside the home. | Feed buildup, droppings around roosts, cobwebs, and pest access points. |
| Full cleanout as needed | Move birds to a safe temporary area, remove litter and debris, clean surfaces, and allow everything to dry. | Persistent dampness, accumulated manure, damaged surfaces, and spots that are hard to reach. |
| Seasonal review | Check the building and routine before weather changes; adjust checks during wet or cold periods. | Drafts at bird level, water intrusion, snow or rain exposure, and ventilation that has been blocked. |
These are planning intervals, not a substitute for observing the flock and coop. If a section becomes wet or dirty sooner, address it then rather than waiting for the next scheduled clean. For a small flock in a roomy enclosure, chores may be quick; a heavily used space can need more frequent attention.
It helps to distinguish a quick spot-clean from a full cleanout. A spot-clean means removing a limited wet or dirty patch and checking why it developed. A full cleanout means clearing the coop so you can inspect and reach the surfaces underneath. If you find yourself doing full cleanouts repeatedly because the same corner gets soaked, first look for the cause: the waterer may be spilling, rain may be blowing through an opening, or the area may be difficult to ventilate. Fixing that source can make each later cleaning more manageable.
What supplies should you gather first?
Collect your tools before opening the coop so you can work without leaving dirty material sitting around. Use dedicated coop-cleaning equipment and keep it separate from kitchen and household items. Depending on the job, you may need:
- Gloves and work clothes that can be cleaned after use.
- A shovel, scraper, or stiff brush for litter and stuck debris.
- A container or wheelbarrow for carrying waste away.
- Fresh, dry bedding appropriate for your flock and setup.
- Soap, water, and a brush for feeders and water containers.
- A cleaning or disinfecting product labeled for the intended use, if disinfection is needed.
- A safe temporary pen or enclosure to keep birds away from the work area.
Read product labels before use. Follow directions for dilution, protective gear, rinsing, and drying, and never mix cleaning products. Stronger is not automatically better. Routine removal of litter and visible soil is different from disinfecting; disinfectant cannot do its job well on top of a layer of manure and dirt. If you are unsure which product is appropriate for your situation, ask a poultry-health professional or local extension service.
Before starting, decide where dirty litter will go and where clean items will dry. Set the wheelbarrow or waste container outside the path you will use for clean bedding and equipment. Put brushes and scrapers within reach, and avoid setting cleaned water containers on a dirty surface. A simple clean-to-dirty workflow prevents you from carrying debris back across an area you have already finished.
How do you clean a chicken coop step by step?
1. Move the flock away from the work area
Put the chickens in a secure temporary space with appropriate access to water and protection. Keep them away until the coop is clean and fully dry. This limits their contact with dust, debris, and wet cleaning products. Plan the job so the temporary area is ready before you begin.
2. Remove feeders, waterers, and loose equipment
Take out portable items that need separate cleaning. Empty feeders and water containers, then clean them in an area outside the house. The Minnesota Department of Health’s backyard poultry guidance recommends cleaning equipment and materials associated with poultry care outside the home. Wash containers with soap and water, rinse them well, and let them dry before returning them. Check for cracks or worn parts that hold grime or make a container difficult to clean.
3. Take out litter, manure, and loose debris
Remove bedding and scrape away manure and other material from floors, roosts, and corners. Work from higher surfaces down so debris falls onto areas you have not finished. Pay attention to places hidden beneath perches and around nesting areas. Avoid simply covering old, wet material with a new layer; that leaves the underlying problem in place.
Keep the material contained as you carry it out. Do not shake dirty bedding around the yard, and avoid creating unnecessary dust. The USDA APHIS cleaning checklist for poultry enclosures recommends moving birds out, removing litter, manure, and debris, and dry-cleaning surfaces by brushing, scraping, or shoveling before the wet-cleaning stage. Follow the checklist for the details that apply to your setup: USDA APHIS poultry-enclosure cleaning checklist.
4. Brush and inspect the cleared surfaces
With loose material removed, brush remaining dust and debris from accessible surfaces. Take a moment to inspect the floor, walls, nest boxes, roosts, doors, and hardware. Look for worn or damaged areas, water stains, loose fittings, or gaps that make cleaning difficult. The point is not to rebuild the coop during every cleanout; it is to note what needs attention and avoid letting a small maintenance issue go unnoticed.
Work in a consistent order so you do not overlook the less visible areas. For example, check the upper corners and roosts first, then nest boxes and wall edges, and finish with the floor. Use a flashlight to look beneath fixed ledges or into dark corners. If a scraper cannot reach a tight spot, note whether equipment can be shifted or whether the design makes routine access awkward. The next cleanout is easier when you know where material collects.
5. Wash when the surface or job calls for it
Use water and an appropriate cleaner to remove remaining grime. Avoid soaking areas that are not designed to stay wet, and do not direct dirty runoff toward feed, water, or the birds’ temporary space. If you use a product intended to disinfect, first remove visible organic material, then follow its label exactly. Some products require a specified contact time or a rinse; do not guess at either. Keep chickens out while products are in use.
Not every routine visit calls for washing every surface. Decide based on what remains after dry removal and what the product is intended to address. Washable equipment such as feeders and waterers can be handled separately, while floors and walls should be treated in a way that suits their material and condition. If a surface is cracked, peeling, or holding moisture, more liquid may not solve the underlying maintenance issue. Avoid combining different cleaners or reusing a product outside its labeled purpose.
6. Let the coop dry completely
Drying is part of cleaning, not an optional finishing touch. Give surfaces and bedding areas enough time to dry before adding fresh litter and returning the flock. Open doors or other safe openings when weather allows, while maintaining security. If the structure remains damp, identify the source, such as a leak, splash from a waterer, or poor airflow, rather than covering it with fresh bedding.
Check more than the center of the floor. Bedding can hide moisture at edges, under removable equipment, and along the wall nearest a water container. A surface that looks dry on top may still feel damp underneath. If the weather is rainy or humid, drying may take longer, so allow for that rather than rushing to return the birds. Keep the flock in its temporary space until the coop is ready.
7. Replace bedding and put clean equipment back
Add clean, dry bedding suited to the coop and your routine. Return feeders and waterers only after they have been cleaned and dried. Place them where you can reach them for regular checks and reduce the chance that bedding will be kicked into water. Refill feed in a way that minimizes spills, then confirm that the flock has access to its usual essentials.
Before the birds go back in, make one final pass: check that doors and hardware work, remove cleaning tools, and confirm that no wet cloths or product containers remain inside. Put water and feed where the flock can reach them, then watch the first moments after the return. If the birds immediately scatter bedding into a waterer or knock it out of place, adjust the setup and check again later for new wet patches.
How can you keep feeders, waterers, and bedding under control?
Many coop cleanups begin with one small source of mess. A water container that tips easily can dampen litter. Feed scattered around a feeder can attract unwanted visitors. Watch how birds use the equipment, not just how it looks while the coop is empty.
- Check water daily. Look for leaks, spills, or a container that has shifted. Replace damp bedding instead of leaving it to accumulate.
- Keep feed contained. Sweep up spilled feed and close storage containers securely. Avoid leaving excess feed scattered around the coop.
- Clean containers separately. Wash feeders and waterers outside the home, rinse as directed, and allow them to dry before reuse.
- Choose a bedding routine you can maintain. Whatever material you use, monitor its condition and remove wet or heavily soiled areas promptly.
- Keep a small maintenance kit nearby. Dedicated tools make it easier to handle a minor spill as soon as you notice it.
For poultry handling and household hygiene, the CDC advises washing hands with soap and water after handling chickens, eggs, or anything in their environment, and keeping the coop clean. Review its backyard poultry guidance and make handwashing part of the routine every time you finish coop work.
A repeatable cleanup sequence can also help if several people care for the flock. Keep a short written checklist near your supplies: water and feed check, remove wet patches, clean equipment as needed, and record repairs to follow up. One person can note a leak without assuming another person already handled it. For a small flock, the record can be as simple as a calendar mark and a note such as “waterer moved” or “north corner wet.” Patterns become easier to see when observations are recorded consistently.
What changes during an Upstate New York winter?
Cold weather changes the timing and conditions of coop chores. In Hudson Falls and across Upstate New York, wet bedding, snow carried inside, and frozen or spilled water can make a quick inspection especially useful. Keep the same core sequence: remove wet material, clean equipment, and maintain a dry space, but adjust when you do it to suit conditions.
After a storm or thaw, check for moisture near openings and around water containers. Make sure ventilation remains available; closing every opening to keep out cold can trap damp air. At the same time, consider the flock’s comfort and the building’s design rather than making a large change based on a generic rule. Keep pathways to the coop clear enough for safe access, and store cleaning tools where they can be reached when conditions are poor.
In winter, a brief check after a weather change can be more useful than waiting for a regular weekly chore day. Look for tracked-in snow near the entrance and damp spots where birds gather. If water is carried in and out, watch for drips along the route and clean them before they soak bedding. Plan larger wash-and-dry jobs for a period when you can safely give the structure adequate time to dry. When the weather does not allow that, remove soiled dry material and postpone any unnecessary wet cleaning.
A seasonal check is also a good time to review the coop itself. Look for worn surfaces, loose hardware, and spots that are hard to reach with a scraper or brush. A practical building is one that fits both the flock and the keeper’s real cleaning routine. If you are comparing structures, see the available chicken coops at Legacy Structures and the current building inventory.
How can you tell whether your cleaning routine is working?
Use a short, repeatable check after each cleanout. The coop should be free of accumulated soiled litter, equipment should be clean and dry, and there should not be a persistent damp or unpleasant smell. Look at the areas that are easy to miss, including beneath roosts, beside nest boxes, and around water containers. If the same spot becomes wet again, the useful question is what is causing it, not how often you can cover it with fresh bedding.
A simple note on a calendar or phone can reveal a pattern. Record when you refreshed bedding, cleaned containers, or found a leak. If a coop needs attention more often during rainy weather or when the flock is larger, you can plan for that rather than relying on memory. This also helps you notice whether a maintenance fix solved the original issue.
For example, if dampness returns within a day or two of every cleanout, note the exact location and what was happening nearby. Check whether a water container was recently refilled, whether rain blew through an opening, or whether wet boots and snow are being tracked inside. If the same area remains dry after changing the waterer’s position, keep observing it over several checks before deciding that the problem is resolved. This small troubleshooting habit is more useful than changing several parts of the routine at once, because it helps you connect a change with the result.
When choosing a new coop, think beyond appearance. Consider how easily you can reach the floor, roosts, and corners; whether equipment can be removed for cleaning; and whether the layout allows routine checks without awkward lifting or stretching. Legacy Structures offers a range of portable buildings, and you can learn about Legacy Structures or ask about a setup that suits your property and intended use.
Common chicken-coop cleaning mistakes to avoid
- Cleaning around the birds. Move them to a secure separate area while you remove debris and use cleaning products.
- Adding fresh bedding over a wet patch. Find and remove the damp material, then address the source of moisture.
- Skipping the dry-cleaning step. Remove visible litter and debris before washing or disinfecting surfaces.
- Using a product without reading its label. Confirm how it should be used, whether it needs rinsing, and when birds may safely return.
- Bringing dirty equipment into the home. Clean poultry-related equipment outside the house and keep dedicated tools separate.
- Blocking ventilation to keep the coop warm. Review airflow and moisture together; do not solve one problem by creating another.
- Waiting for a full cleanout to notice small problems. Daily and weekly checks can catch leaks, spills, and damaged areas early.
Avoid making a cleanup harder than it needs to be by mixing several tasks together without a plan. If you are washing surfaces, do not put clean bedding in the coop first. If you are repairing a loose fitting, finish that task before returning clean equipment. Keeping the sequence: remove, inspect, clean if needed, dry, restock, reduces rework and makes it clear what still needs attention.
Call 518-544-2889 to discuss chicken coop options with Legacy Structures.
Frequently asked questions
Can I clean a chicken coop while the chickens are inside?
For a full cleanout or any job involving cleaners, move the flock to a secure temporary area first. Keep them away until the work is complete and the coop is dry. You can still do a quick visual check while the birds are present, but avoid creating unnecessary dust or disturbing them as you remove soiled material.
Do I need to disinfect the coop every time I change bedding?
Not necessarily. Removing soiled litter and debris is routine cleaning; disinfection is a separate step for situations where it is appropriate. When you use a disinfecting product, follow the label and apply it only after visible dirt has been removed. If you are dealing with a flock health concern, ask a poultry-health professional or local extension service for situation-specific advice.
How do I know when bedding needs to be changed?
Check its condition rather than relying only on a fixed number of days. Remove material that is wet, heavily soiled, or causing a persistent odor, and investigate the source of moisture. The amount of bedding to replace and how often it needs attention will depend on the flock, coop, weather, and management routine.
What should I do if the coop stays damp after cleaning?
Do not simply add fresh bedding on top. Check for leaks, water spills, wet weather entering through an opening, and airflow that may be inadequate. Keep the flock out of wet areas while they dry, and seek local poultry-care advice if the moisture problem continues or you have concerns about bird health.
A manageable cleaning routine is built from observation: remove soiled material, keep equipment clean, allow surfaces to dry, and make small adjustments when the same problem returns. With regular checks, coop care can become a straightforward part of keeping a flock.