
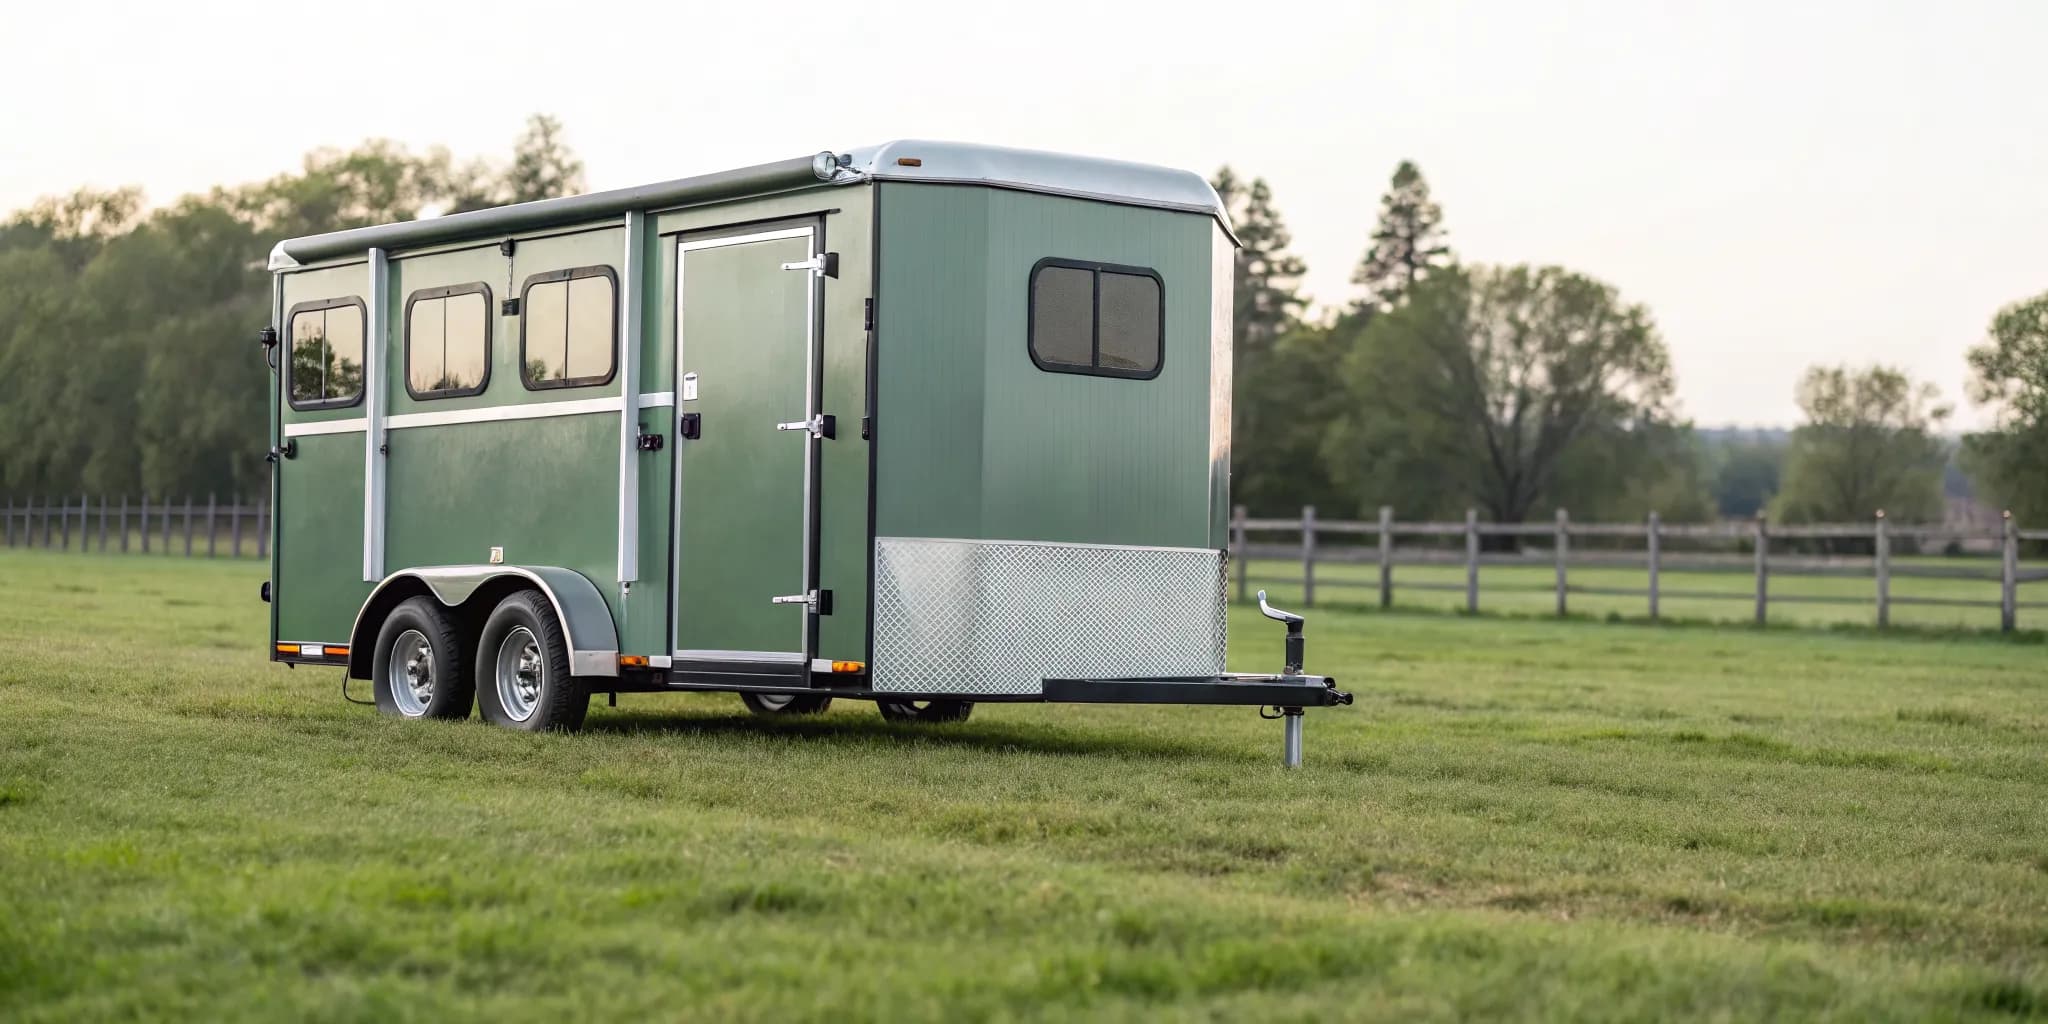
The journey to building the perfect chicken nesting trailer often starts with a treasure hunt. You’re not looking for something shiny and new, but rather a sturdy, forgotten trailer with good bones that’s ready for a second life. An old horse trailer sitting in a field or a simple flatbed found on a marketplace can be the perfect foundation for your project. The beauty of this DIY approach is transforming something old into a functional, mobile home for your flock. This guide will walk you through everything, starting with how to find and inspect a used trailer, ensuring you have a solid base for the safe and productive coop you’re about to create.
Key Takeaways
- Prioritize mobility for a healthier flock and pasture: A chicken nesting trailer's key benefit is enabling pasture rotation. This practice gives your hens a varied diet and clean ground, which reduces their exposure to parasites and improves your land.
- Design for safety, health, and easy cleaning: A successful coop requires thoughtful design. Focus on creating good cross-ventilation, using hardware cloth for predator-proofing, and planning for easy access to clean-out areas and nesting boxes.
- Evaluate a DIY build against a pre-built coop: Building your own trailer is a rewarding, cost-effective project if you are handy. For a faster solution, consider a professionally built structure or a rent-to-own program to get a durable coop without the construction time.
What Is a Chicken Nesting Trailer & Why Build One?
If you’ve ever dreamed of giving your flock fresh pasture to forage, a chicken nesting trailer might be the perfect project for you. At its core, a chicken nesting trailer is a mobile chicken coop built on a trailer frame, designed to be easily moved from one spot to another. This mobility is the key difference between a trailer and a traditional, stationary chicken coop. While stationary coops are fantastic for providing a permanent, secure home, a mobile setup offers unique benefits, especially for those with a bit of land.
Building one yourself allows you to customize every detail to fit your flock's needs and your property's layout. You can design it with specific features for easy cleaning, egg collection, and predator protection. The main draw is the ability to practice rotational grazing, which gives your chickens a constant supply of fresh greens and insects while also giving your pasture time to recover. This simple practice leads to healthier, happier chickens and can even improve the quality of your land. For the hands-on chicken keeper, a DIY nesting trailer is a rewarding project that offers a flexible and efficient way to manage your flock.
The Advantage of a Mobile Coop for Pasture Rotation
The biggest advantage of a chicken trailer is the ability to practice pasture rotation. Moving your coop every few days or once a week gives your chickens access to fresh grass, clover, and tasty bugs. This constant change of scenery keeps them entertained and provides a more varied, nutrient-rich diet than feed alone. Think of it as a mobile salad bar for your flock.
This practice is not only good for your chickens but also for your land. As the American Poultry Association notes, mobile coops allow you to move chickens to fresh grass, which is good for the chickens and the land. Instead of one area getting decimated and turning into a muddy patch, the chickens' scratching and fertilizing activity is spread evenly across your property. This helps maintain a healthy pasture and reduces the buildup of parasites in the soil.
How It Leads to Healthier Hens and Cleaner Eggs
A mobile coop directly contributes to a healthier flock and cleaner eggs. By regularly moving the coop, you prevent the concentration of droppings in one area. This drastically reduces your flock’s exposure to parasites and bacteria that can thrive in a static environment, leading to fewer health issues and vet bills. A clean environment is the first step to a healthy flock.
Beyond mobility, smart design choices inside the trailer can make a huge difference in egg cleanliness. Many DIY builders incorporate rollaway nesting boxes, which use a gentle slope to guide eggs into a protected collection tray as soon as they’re laid. Some designs even include automatic gates that close at night, preventing hens from sleeping in the nests and dirtying them. These features mean less time scrubbing eggs and more time enjoying your fresh breakfast.
A Cost-Effective Alternative to a Stationary Coop
For many, building a chicken nesting trailer is a cost-effective way to get a high-quality coop without the price tag of a large, pre-built stationary structure. If you’re comfortable with a DIY project, you can save a significant amount of money by using a second-hand trailer and sourcing affordable or reclaimed building materials. It’s a project that lets you invest sweat equity to create the perfect home for your flock.
While the DIY route is rewarding, it’s not for everyone. If you need a quality coop but aren't ready to build one from scratch, exploring options like a rent-to-own program for a pre-built structure can be a great alternative. This allows you to get a durable, professionally built coop with manageable payments, giving you another practical path to raising happy, healthy chickens.
How to Find the Right Trailer for Your Coop
Finding the right trailer is the first real step in this adventure, and it’s a bit like a treasure hunt. You’re not looking for something shiny and new. Instead, you’re searching for a diamond in the rough, a sturdy frame with good bones that you can transform. The goal is to find a base that’s affordable and mobile, giving you the freedom to create a custom coop. If you're looking for inspiration on layouts and features, checking out professionally built chicken coops can give you a great starting point for your own design. Let’s get into what to look for and where to find it.
The Best Trailer Types to Convert
Your best bet is to look for old horse trailers or stock trailers. These are fantastic candidates because they already have a solid frame and are partially enclosed, which saves you a ton of work. Think of it as a head start on your build. You can often find older models that are no longer suitable for hauling animals but are perfect for a stationary or pasture-moved coop. A simple flatbed trailer can also work, but it will require you to build the entire structure from the ground up. By starting with a horse or stock trailer, you get a durable base ready for your creative touch.
Where to Look for Affordable Used Trailers
Finding a budget-friendly trailer is totally doable, you just need to know where to look. Start your search on online marketplaces like Facebook Marketplace or Craigslist. You can also check with local farm supply stores or attend farm auctions. Don’t be afraid to just drive through rural areas and keep an eye out for old trailers sitting in fields. I’ve heard stories of people finding ancient horse trailers for next to nothing simply by asking the owner. One person found a 1975 model that was perfect for their project, even though it had flat tires and wasn’t road-worthy. Patience is key, but the deals are out there.
What to Inspect Before You Buy
When you go to check out a potential trailer, you can leave your perfectionism at home. You don’t need something in pristine condition. In fact, things like flat tires, a rotten floor, or non-working lights don’t matter at all, since you’ll likely be gutting and replacing most of it anyway. The single most important thing to check is that the axles can still turn, allowing the wheels to spin. This ensures your coop will be mobile enough to move around your property. Give the frame a good look-over for major rust or damage, but as long as it’s structurally sound and the wheels can turn, you’ve found a winner.
Must-Have Features for a Safe and Productive Coop
Building a chicken coop is exciting, but a few key features can make the difference between a thriving flock and a stressful situation. Before you even start cutting wood for your trailer, it's essential to plan for the elements that keep your hens safe, comfortable, and productive. Think of these as the non-negotiables for any coop design. Whether you're following this DIY guide or considering a professionally built structure, paying close attention to flooring, roosting space, and security will give your chickens the best possible home. High-quality pre-built chicken coops always incorporate these features, giving you a great blueprint for success.
Choose Your Flooring and Bedding
The floor of your coop and the bedding you put on it are your first line of defense against mess and moisture. You want a material that’s easy to clean and keeps your chickens dry. Common options include sand, straw, or wood shavings. Sand is fantastic for sifting waste out easily, while straw provides great insulation for colder months. The key is choosing a material that works for your cleaning routine. As chicken care experts note, the right bedding for your chickens should be absorbent and comfortable while also helping to control odors. A clean, dry environment is fundamental to preventing health issues in your flock.
Plan for Roosts and Proper Spacing
Chickens have a natural instinct to sleep off the ground where they feel safe from predators. Providing roosting bars is essential for their well-being. When planning your layout, make sure each chicken has at least 8 to 12 inches of roosting space to avoid nighttime squabbles. The roosts themselves should be positioned about two to three feet off the ground. This height keeps them clear of the floor and any potential dampness. Getting the dimensions right is a critical part of how to build a chicken coop that promotes flock harmony and health. A simple wooden dowel or even a sturdy branch can make a perfect roost.
How to Predator-Proof Your Design
Your coop’s most important job is to keep your flock safe from predators like raccoons, hawks, and foxes. Start by using hardware cloth on all windows and ventilation openings instead of standard chicken wire, which clever predators can tear through. For extra security, bury the hardware cloth or other wire mesh at least 12 inches deep around the perimeter of your coop and run. This simple step prevents animals from digging their way inside. A solid plan for predator-proofing your chicken coop should also include sturdy materials and secure locks on all doors and nesting box lids. There’s no such thing as being too careful when it comes to protecting your birds.
How to Build Your Own Chicken Nesting Trailer
Building your own chicken nesting trailer is a rewarding project that gives you a mobile, flexible home for your flock. By creating a coop on wheels, you can easily rotate your chickens through different pastures, which gives them access to fresh forage and helps keep your land healthy. This process can seem intimidating, but breaking it down into manageable steps makes it much easier to tackle. We'll walk you through finding a suitable trailer, framing the structure, adding walls and insulation, and installing all the interior features your hens need to be happy and productive.
While this guide walks you through a DIY approach, remember that if you're short on time or prefer a ready-made solution, our high-quality chicken coops are built to last and keep your hens safe and comfortable from day one. They come with our 5-year warranty and are designed with both your flock's well-being and your convenience in mind. But if you’re ready to get your hands dirty and create something truly custom, let’s get started on your build.
Step 1: Gut and Prep the Trailer
Your first task is to find a suitable base for your mobile coop. Old horse or stock trailers are often perfect for this kind of conversion. You can start your search on local marketplace sites or by checking with nearby farms. Don't worry if the trailer you find has seen better days. Flat tires, missing lights, or even a rotten floor aren't deal-breakers as long as the axles are functional enough to let you move it around your property. The goal is to find an affordable frame you can transform into a coop, so focus on mobility and a solid underlying structure.
Step 2: Frame the Walls and Roof
With your trailer prepped, it's time to build the skeleton of your coop. Framing the walls and roof provides the essential structure that will support the siding, insulation, and all the interior features. This step is critical for ensuring the coop is durable and stable, especially since it will be moved from one pasture to another. Use quality lumber to create a sturdy frame that can withstand the elements and the rigors of transport. A solid frame ensures the final structure will be a safe and secure home for your chickens for years to come.
Step 3: Add Siding and Insulation
Next, you’ll add siding and insulation to protect your flock from wind, rain, and temperature extremes. Siding closes in the structure, while insulation helps keep the interior cooler in the summer and warmer in the winter. Proper ventilation is just as important for your chickens' health, so don't seal everything up completely. A great trick is to cover larger openings, like the space above rear doors, with sturdy chicken wire. This maintains excellent airflow to prevent respiratory issues while keeping your hens safely inside and predators out.
Step 4: Install Interior Features and Secure the Coop
The final construction step is to outfit the interior and make it a functional home for your hens. You can create simple and effective nesting boxes using square milk crates turned on their sides. For perches, 2x2 wood boards work perfectly, giving your chickens a comfortable place to roost at night. Make sure you securely fasten all these elements to the trailer's walls or frame. Chickens can be surprisingly active, and you don't want perches or nesting boxes coming loose, especially when you're moving the trailer to a fresh patch of grass.
Designing Nesting Boxes That Actually Work
The nesting box is the most important feature of your coop from your hens’ perspective. If you want a steady supply of clean, unbroken eggs, you need to create a space where your chickens feel safe and comfortable laying them. A well-designed nesting area encourages hens to lay where you want them to, not in a hidden corner of the run or under a bush. The goal is to make the boxes dark, private, and easy for you to access for collection.
Getting this part right from the start will save you a lot of headaches later. When hens approve of their nesting spots, they'll use them consistently. This means you won't have to go on an egg hunt every morning, and your eggs will stay much cleaner and safer from accidental cracks. If you're looking for inspiration on how a great layout works, checking out professionally built chicken coops can give you some excellent ideas for your own DIY project. The right design makes all the difference for both you and your flock.
Rollaway vs. Simple Box Designs
You have two main options for nesting boxes: a simple box or a rollaway design. A simple box is just what it sounds like, a basic cube filled with soft bedding like straw or pine shavings. It’s easy to build, but you’ll need to collect eggs frequently to prevent them from getting dirty or broken.
A rollaway nesting box is a bit more advanced. It has a slightly sloped floor, so when a hen lays an egg, it gently rolls into a protected compartment. This keeps the eggs incredibly clean and safe from being pecked or stepped on. While commercial systems can be quite sophisticated, you can build a DIY version with a slanted floor that directs eggs to a collection tray outside the main coop area.
Get the Placement and Size Just Right
Where you put the nesting boxes matters. Hens prefer to lay their eggs in a quiet, dark, and private spot away from the hustle and bustle of the coop. Place your boxes in the calmest corner of your trailer, away from the main door, food, and water. A good rule of thumb is to provide one 12x12x12-inch box for every four to five hens.
Make sure the boxes are easy for you to access, too. You don't want to have to crawl into the coop every day to gather eggs. Design an external access door or a hinged lid for your nesting box area. Remember to leave yourself enough room to work; plan for about three feet of clear space around the boxes for comfortable and easy egg collection.
Use Automatic Gates to Keep Nests Clean
One of the biggest challenges with nesting boxes is keeping hens from sleeping in them. If they roost in the nests overnight, they’ll leave droppings all over the bedding, which means dirty eggs for you to scrub. The best way to prevent this is to make the roosting bars higher and more appealing than the nesting boxes.
For an even better solution, you can use gates on your nesting boxes. Some high-end systems use automatic gates that close in the evening to keep chickens out and reopen in the morning before they start laying. You can create a simpler DIY version with a hinged board that you manually close each night after the hens have gone to roost. This single step will dramatically reduce how often you need to clean the boxes and wash your eggs.
How to Get Ventilation and Lighting Right
Your chickens’ health and happiness depend heavily on their environment. Proper ventilation and lighting aren't just nice-to-haves; they are essential for preventing respiratory illnesses, reducing stress, and encouraging consistent egg-laying. A stuffy, dark coop is a recipe for problems, while a bright, airy one keeps your flock thriving. Getting these elements right in your DIY trailer build is straightforward when you know what to focus on. It’s all about creating good airflow, letting in plenty of natural sunlight, and keeping the temperature just right throughout the year.
Create Cross-Ventilation for Good Airflow
Good airflow is your best defense against moisture and ammonia buildup, which can harm your hens’ respiratory systems. An easy way to create cross-ventilation is by covering large openings, like the space above rear doors, with sturdy chicken wire. This keeps predators out while letting fresh air circulate freely. On hot summer days, you can open access doors at the front and back of the trailer to create a refreshing breeze. In the winter, keep these main doors closed to conserve warmth, but ensure your vents are still open to allow stale, moist air to escape. Our pre-built chicken coops are designed with optimal ventilation in mind for a healthy flock.
Add Clear Panels for Natural Light
Chickens, like us, benefit from natural sunlight. It regulates their laying cycles and keeps them active and content. An easy way to brighten your mobile coop is by adding clear panels to the walls or roof. You can rivet clear, wavy fiberglass sheets over openings on the sides of the trailer to let sunlight pour in from different angles throughout the day. This simple addition helps mimic their natural environment and can make a huge difference in their overall well-being. Thinking about how to maximize natural light is a key part of designing any outdoor structure, from a coop to one of our greenhouses.
Insulate for Year-Round Temperature Control
With the cold winters we get in Hudson Falls, insulation is non-negotiable. A well-insulated coop protects your flock from frigid temperatures and biting winds, preventing frostbite and reducing stress so they can keep laying. A trailer provides a solid shell, but you’ll want to add insulation to the walls and ceiling. Rigid foam board is a popular and effective choice for DIY projects. Proper insulation also helps keep the coop cooler in the summer, providing a comfortable retreat from the heat. Ensuring your structures are built for four-season comfort is something we take seriously, whether it's a coop or one of our portable cabins.
Common Building Mistakes to Avoid
Building your own chicken nesting trailer is such a rewarding project, but a few common missteps can turn your dream coop into a bit of a headache. Getting the design right from the start saves you time, money, and stress down the road. More importantly, it ensures your flock stays healthy and happy. Before you finalize your plans, let's walk through a few critical mistakes builders often make so you can sidestep them completely.
Thinking about these details now will help you create a coop that’s not only functional but also a safe and comfortable home for your hens for years to come. A well-designed coop makes daily chores easier and prevents common health issues that can plague a flock. It’s all about creating a balanced environment. From airflow to personal space, every detail matters to your chickens. Getting these things wrong can lead to respiratory problems, pecking order disputes, and a coop that’s a chore to maintain. By focusing on a smart design, you’re investing in your flock’s well-being and your own peace of mind. If you ever want to see these principles in action, looking at professionally built chicken coops can provide great inspiration and a solid benchmark for your own project. Let's get into the specifics so your build is a success from day one.
Inadequate Ventilation or Insulation
Proper airflow is non-negotiable in a chicken coop. Without it, moisture and ammonia from droppings build up, creating a damp environment that can cause serious respiratory issues for your flock. As the University of Minnesota Extension notes, good housing for backyard chickens must remove this excess moisture. At the same time, insulation is key for managing temperature swings. Chickens are sensitive to extreme heat and cold, and a well-insulated coop helps keep them comfortable year-round, which supports consistent egg production. Don’t treat ventilation and insulation as afterthoughts; they are fundamental to your flock’s health.
Overcrowding and Not Enough Space
It can be tempting to squeeze a few extra birds into your coop, but overcrowding is a recipe for disaster. It leads to stress, bullying, and the rapid spread of disease. A good rule of thumb is to provide at least four square feet of coop space per chicken and ten square feet in their outdoor run. This gives them enough room to stretch their wings and engage in natural behaviors like dust bathing and foraging. Giving your hens adequate space isn't just about comfort, it's essential for their physical and mental well-being. A happy, stress-free hen is a healthy, productive hen.
A Design That's Hard to Clean
You’ll be cleaning your chicken coop regularly, so do your future self a favor and make it as easy as possible. A complicated design with tight corners and hard-to-reach areas will quickly become a chore you dread. This can lead to a buildup of waste and harmful bacteria, putting your flock at risk for illness. When designing a chicken coop, think about access. Consider features like a walk-in door, large clean-out panels, or even removable floors. The easier it is to scrub and sanitize, the more likely you are to keep up with it, ensuring a clean and healthy home for your chickens.
Maintaining Your New Chicken Trailer
Once your chicken trailer is built, the real work of raising happy hens begins. Consistent maintenance is the key to keeping your flock healthy and ensuring your new coop lasts for years. A little bit of weekly and seasonal care goes a long way in preventing disease, deterring pests, and keeping your trailer structurally sound. Think of it as protecting your investment and, more importantly, the well-being of your chickens. Creating a simple routine will make these tasks feel less like chores and more like a natural part of your homesteading rhythm.
Your Weekly Cleaning and Bedding Schedule
A clean coop is the foundation of a healthy flock. To keep harmful bacteria and parasites from building up, you’ll want to establish a weekly cleaning schedule. Plan to scoop out all the old droppings and soiled bedding at least once a week. After you’ve cleared out the old material, lay down a fresh, thick layer of absorbent bedding like pine shavings or straw. This simple weekly reset keeps the air fresh, gives your hens a comfortable space, and makes your eggs much cleaner and easier to collect. A well-maintained space is essential for any of our chicken coops.
Perform Regular Structural and Pest Checks
Give your trailer a quick once-over every few weeks to catch small problems before they become big ones. Check for any loose boards, wobbly screws, or signs of rust on the hardware and make repairs right away. This is also the perfect time to play detective and look for signs of unwanted visitors like rodents or insects. Seal up any tiny cracks or holes that could serve as an entry point. Keeping your coop secure not only protects your flock from predators but also ensures the structure remains solid, which is why our buildings come with a 5 Year Warranty.
Prep Your Coop for Each Season
Seasonal changes require a few adjustments to keep your chickens comfortable. As winter approaches, add extra bedding for insulation and check that your ventilation prevents moisture buildup without creating a draft. You’ll also need a plan to keep their water from freezing. For summer, focus on airflow and shade to prevent overheating. Make sure your vents are clear and consider adding a fan on especially hot days. Preparing your coop for the weather ahead ensures your hens stay healthy and productive all year long. You can see examples of sturdy, all-weather structures in our current inventory.
Related Articles
- Chicken Coop | Legacy Structures
- Animal Shelter | Legacy Structures
- Mini Barn | Legacy Structures
- Lofted Barn | Legacy Structures
- Lofted Barn | Legacy Structures
Frequently Asked Questions
Is a mobile chicken trailer really better than a regular stationary coop? One isn't necessarily better than the other; it just depends on your goals and your property. A mobile trailer is the clear winner if you want to practice pasture rotation, giving your chickens fresh ground to forage and spreading their fertilizing services around your land. A stationary coop, however, can offer a more permanent, fortress-like structure that might be better for smaller backyards or for people who prefer a single, fixed location for their flock.
I'm not very handy. Is building a chicken trailer a realistic project for a beginner? This is a great question. Building a trailer coop is a significant project that requires some basic tools and a willingness to learn. The process can be very rewarding, but it's important to be honest about the time and effort involved. If you're feeling unsure or simply don't have the time, a professionally built coop is a fantastic alternative. It gives you all the benefits of a safe, well-designed home for your flock without the construction challenges.
How often should I move the chicken trailer, and isn't that a lot of work? The frequency depends on the size of your flock and the patch of pasture they're on, but a good starting point is to move it every few days or at least once a week. The goal is to move them before they've worn the ground down to dirt. While it sounds like a chore, moving a well-designed trailer is usually a quick job. It often takes less time than the deep cleaning required for a stationary coop where manure builds up in one spot.
What if I can't find an old horse trailer? Are there other options for the base? Absolutely. While old horse or stock trailers are ideal because they provide a partial structure, they aren't your only choice. A simple flatbed or utility trailer can work just as well. Using a flatbed gives you a completely blank slate to design your coop from the ground up, offering total creative freedom. The most important factor is finding a frame with axles that still work, ensuring you can move it around your property.
Are rollaway nesting boxes necessary, or can I just use simple boxes? Rollaway nesting boxes are a wonderful feature, but they aren't strictly necessary. A simple, well-bedded box will work just fine, especially if you are diligent about collecting eggs daily. The main advantage of a rollaway design is that it keeps eggs exceptionally clean and safe from being cracked or eaten. It's a trade-off: simple boxes are easier to build, while rollaway boxes require more effort upfront but save you time on egg cleaning later.